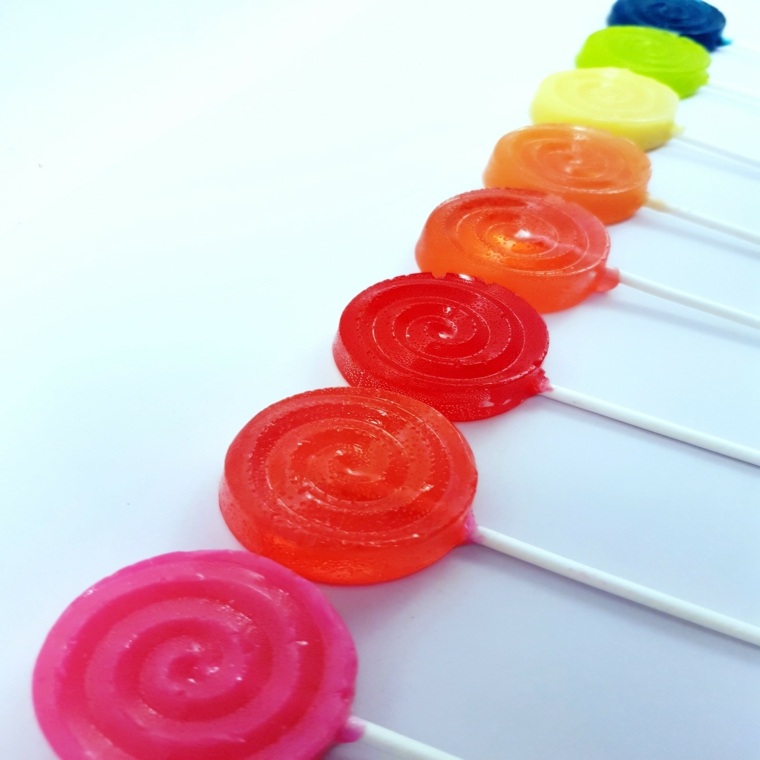
¿Cómo hacer bombones y chupetes caseros para aliviar el dolor de garganta y la tos?
Los problemas de garganta y la tos son afecciones comunes que afectan a personas de todas las edades. A menudo, buscamos remedios caseros para aliviar estos síntomas y sentirnos mejor rápidamente. En este artículo, te enseñaremos cómo hacer bombones y chupetes caseros para aliviar el dolor de garganta y la tos de forma natural y deliciosa.
Los ingredientes clave para estos dulces son el miel y el limón, conocidos por sus propiedades antibacterianas y antioxidantes que ayudan a combatir las infecciones de garganta. El proceso de elaboración es simple y requiere ingredientes que generalmente tenemos en casa.
Para hacer bombones caseros para aliviar el dolor de garganta y la tos, necesitarás los siguientes ingredientes:
– 1 taza de miel
– 1/2 taza de jugo de limón
– 1 cucharadita de jengibre rallado
– 1 cucharada de menta fresca picada
– 1/2 taza de azúcar en polvo (opcional, para espolvorear)
En primer lugar, en una cacerola pequeña, mezcla la miel y el jugo de limón a fuego medio. Revuelve constantemente hasta que la mezcla esté suave y bien combinada. Luego, agrega el jengibre rallado y la menta picada, mezclando nuevamente para incorporarlos por completo.
Después de unos minutos de cocción, retira la cacerola del fuego y permite que la mezcla se enfríe durante unos minutos. A continuación, toma pequeñas porciones con una cucharilla y colócalas en un plato forrado con papel encerado. Deja que los bombones se enfríen completamente y, si lo deseas, espolvoréalos con azúcar en polvo para darles un toque extra de dulzura.
Para hacer chupetes caseros para aliviar el dolor de garganta y la tos, necesitarás los siguientes ingredientes:
– 1/2 taza de miel
– 1/4 taza de jugo de limón
– 1 cucharadita de ralladura de limón
– 1 cucharada de menta fresca picada
– Palitos de madera o plástico para chupetes
En una cacerola pequeña, calienta la miel y el jugo de limón a fuego medio-bajo. Asegúrate de no hervir la mezcla, ya que esto puede eliminar algunas de las propiedades beneficiosas de los ingredientes. Agrega la ralladura de limón y la menta picada, revolviendo para mezclar.
Retira la cacerola del fuego y deja que la mezcla se enfríe durante unos minutos. Luego, vierte pequeñas porciones de la mezcla en moldes para chupetes caseros o utiliza cucharillas para darles forma redonda. Coloca los palitos de madera o plástico en cada chupete y déjalos enfriar por completo antes de consumirlos.
Tanto los bombones como los chupetes caseros para aliviar el dolor de garganta y la tos son una alternativa saludable y deliciosa a los medicamentos convencionales. Estos dulces no solo alivian los síntomas, sino que también proporcionan un alivio reconfortante y natural.
Recuerda consultar a un médico si los síntomas persisten o empeoran. Estos remedios caseros son complementarios al tratamiento médico, pero no pueden reemplazarlo.
¡No sufras más con el dolor de garganta y la tos! Prueba estos bombones y chupetes caseros y disfruta del alivio natural que te brindan mientras disfrutas de su sabroso sabor. Además, puedes compartirlos con tu familia y amigos, ya que también son una deliciosa opción para aliviar sus síntomas. ¡No dudes en probarlos y descubrir los beneficios que te pueden brindar! En resumen, los problemas de garganta y la tos son afecciones comunes que afectan a personas de todas las edades. Para aliviar estos síntomas de forma natural y deliciosa, se pueden hacer bombones y chupetes caseros utilizando miel y limón, conocidos por sus propiedades antibacterianas y antioxidantes. Estos dulces son fáciles de hacer y requieren ingredientes que generalmente tenemos en casa.
Para hacer los bombones, se mezcla la miel y el jugo de limón en una cacerola y se revuelve hasta que estén bien combinados. Luego, se agrega jengibre rallado y menta picada, y se mezcla nuevamente. La mezcla se cocina durante unos minutos, se retira del fuego y se deja enfriar. Se toman pequeñas porciones y se colocan en un plato forrado con papel encerado. Los bombones se enfrían por completo y se pueden espolvorear con azúcar en polvo si se desea.
Para hacer los chupetes, se calienta la miel y el jugo de limón en una cacerola, sin dejar que hierva. Luego, se agrega ralladura de limón y menta picada, y se revuelve para mezclar. La mezcla se retira del fuego y se deja enfriar. Se vierten pequeñas porciones en moldes para chupetes caseros y se colocan los palitos de madera o plástico. Los chupetes se enfrían por completo antes de consumirlos.
Tanto los bombones como los chupetes caseros son una alternativa saludable y deliciosa a los medicamentos convencionales para aliviar el dolor de garganta y la tos. Sin embargo, es importante consultar a un médico si los síntomas persisten o empeoran, ya que estos remedios caseros son complementarios al tratamiento médico pero no pueden reemplazarlo.
En definitiva, prueba estos bombones y chupetes caseros para aliviar el dolor de garganta y la tos y disfruta del alivio natural y sabroso que te brindan. Además, puedes compartirlos con tus seres queridos, ya que también son una opción deliciosa para aliviar sus síntomas. Recuerda que estos dulces son solo para aliviar los síntomas temporales y no deben sustituir un tratamiento médico adecuado en caso de enfermedades más graves. Siempre es importante consultar a un médico si los síntomas persisten o empeoran. En resumen, los problemas de garganta y la tos son comunes en personas de todas las edades y a menudo buscamos remedios caseros para aliviarlos. Los bombones y chupetes caseros hechos con miel y limón son una opción natural y deliciosa para aliviar el dolor de garganta y la tos. Los ingredientes clave de estos dulces tienen propiedades antibacterianas y antioxidantes que ayudan a combatir las infecciones de garganta. Los bombones se hacen mezclando miel, jugo de limón, jengibre rallado y menta picada, y luego se colocan en un plato para enfriar. Los chupetes se hacen calentando miel, jugo de limón, ralladura de limón y menta picada, y luego se colocan en moldes con palitos para enfriar. Estos dulces son una alternativa saludable a los medicamentos convencionales, pero es importante consultar a un médico si los síntomas persisten o empeoran. Algunos síntomas de problemas de garganta y tos incluyen dolor o irritación en la garganta, dificultad para tragar, tos seca o productiva, y congestión nasal. Estos síntomas pueden ser causados por diferentes factores, como resfriados, gripe, alergias, infecciones bacterianas o virales, o reflujo ácido.
El uso de remedios caseros para aliviar estos síntomas puede ser una opción natural y efectiva. Los ingredientes clave utilizados en los bombones y chupetes caseros son la miel y el limón, ambos conocidos por sus propiedades medicinales.
La miel tiene propiedades antibacterianas y antiinflamatorias, lo que la hace efectiva para aliviar el dolor de garganta y la tos. Además, la miel también ayuda a calmar la garganta irritada y a lubricar las membranas mucosas.
El limón, por otro lado, es rico en vitamina C y antioxidantes, que fortalecen el sistema inmunológico y ayudan a combatir las infecciones. El limón también tiene propiedades antibacterianas y ayuda a aliviar la congestión nasal.
El jengibre y la menta también se utilizan en estos dulces debido a sus propiedades antiinflamatorias y analgésicas. El jengibre ayuda a aliviar la tos y la congestión, mientras que la menta proporciona un efecto refrescante y calmante en la garganta irritada.
Al hacer los bombones y chupetes caseros, es importante asegurarse de no hervir la mezcla de miel y limón, ya que el calor excesivo puede eliminar algunas de las propiedades beneficiosas de estos ingredientes.
Es importante tener en cuenta que estos remedios caseros son complementarios al tratamiento médico y no deben reemplazarlo. Si los síntomas persisten o empeoran, es recomendable consultar a un médico para recibir un diagnóstico adecuado y un tratamiento adecuado.
En resumen, los bombones y chupetes caseros hechos con miel y limón son una opción natural y deliciosa para aliviar el dolor de garganta y la tos. Estos dulces contienen ingredientes con propiedades antibacterianas y antioxidantes que ayudan a combatir las infecciones de garganta. Sin embargo, es importante consultar a un médico si los síntomas persisten o empeoran.

Get ready to discover some amazing recipes for homemade healthy chocolates and lollipops that can even help soothe a sore throat and cough.
When we have a mild cold that doesn’t require serious medical treatment, all we need is something to relieve the symptoms until our immune system fights off the illness. Pharmacies sell many throat lozenges that can do the trick, and doctors often prescribe them in such cases. However, many of these medications are not suitable for children or contain artificial sweeteners and harmful colorants that are best avoided.
However, there are some healthy natural ingredients that you can use to make delicious and effective homemade chocolates and lollipops to relieve sore throats and other discomforts without any risk. And the best part is that by making them yourself, you’ll know exactly what they contain and won’t have to worry about unhealthy ingredients.

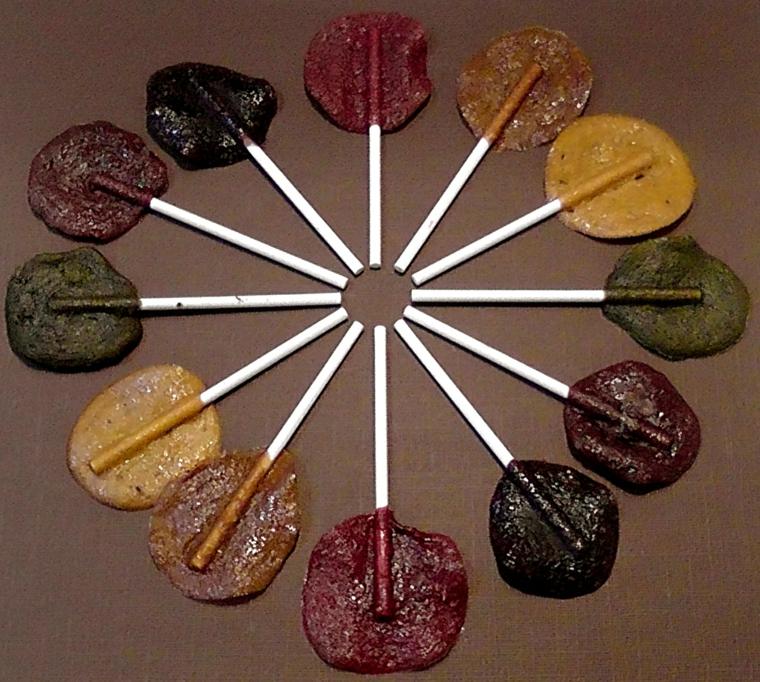
1. Honey lollipops – a natural remedy for sore throats
It is known that honey and cinnamon have antibacterial, antiviral, and antifungal properties, in addition to being delicious and used in many sweet recipes.
These honey lollipops can soothe your child’s sore throat the next time they have a cold, and you won’t have to force them to take “medicine” because they are very tasty. Plus, there’s a risk that kids will keep asking for these honey lollipops long after they’ve recovered. But that’s not a bad thing because their healthy ingredients can also serve for preventing future illnesses.
For a child under two years old, this would be a good alternative to cough drops that can pose a choking hazard. On the other hand, you can make this as a cough drop or candy, simply omitting the stick if it’s for an adult or older child. If you end up with more lollipops than you need to soothe a sore throat, they can be stored for a long period of time in a cool, dry place and can also be used as a sweetener/stirrer for a cup of hot tea in the cold months. I recommend making them in advance and having them on hand for the next time someone catches a cold.
Honey lollipops: a natural remedy for inflamed throats
Recipe for 12-14 lollipops or candies depending on size
A low-cost candy thermometer, available at most grocery and kitchen stores, makes these especially easy to prepare.
Ingredients:
1/3 cup honey
¼ teaspoon cinnamon, optional
Lollipop sticks (available at craft stores)
Instructions:
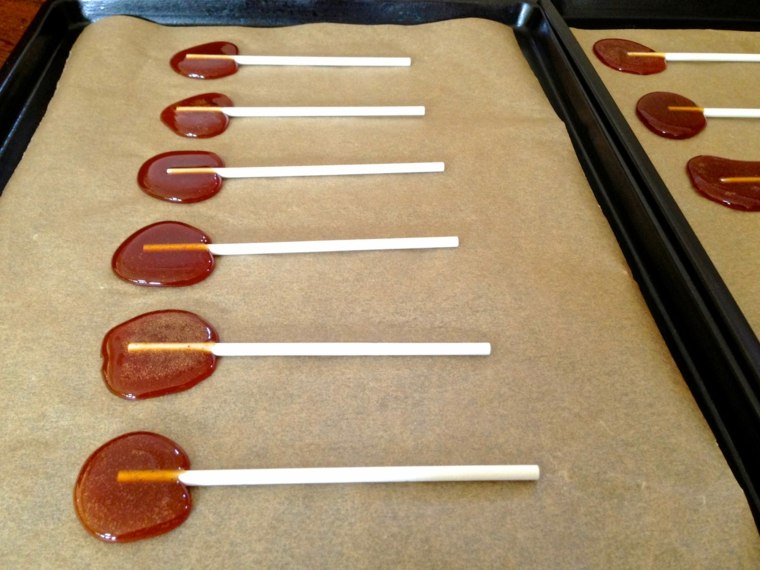
Place the lollipop sticks on a baking sheet lined with parchment paper.
Pour the honey into a small saucepan and bring to a boil over medium-low to medium heat for about 10 minutes or until the temperature on your candy thermometer reaches 300 degrees F. The honey will start to bubble. Adjust the heat so that the honey continues to bubble but doesn’t boil, stirring occasionally. (If you don’t have a thermometer, you can test if the honey is cooked by dropping a drop or two into a container filled with very cold water. If the honey hardens into a ball, it’s ready. If it remains soft to the touch, keep boiling)
Once the honey has reached 300 degrees F, remove the pot from the heat. Stir the honey and allow it to cool for one or two minutes. Add the cinnamon, if using, and stir to fully mix.
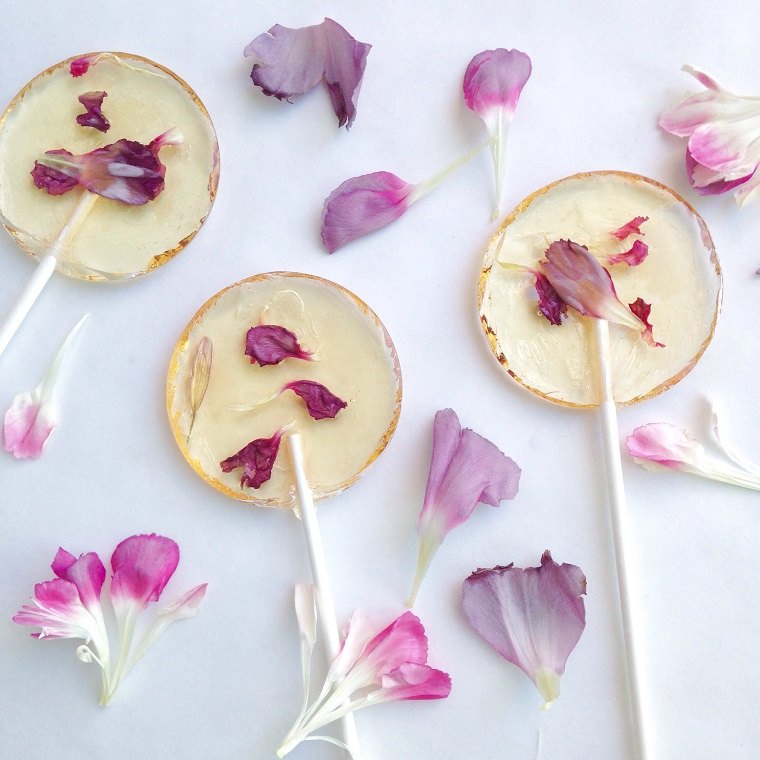
Slowly pour the still-hot mixture onto one end of the lollipop sticks. When the honey is very hot, it will spread and form an irregular circle. Your first lollipops may be thin and misshapen. As the honey cools, it becomes easier to pour an even circle. If desired, you can even out the first lollipops by pouring a little more honey over them at the end. Thinner lollipops will pAre you looking for a fun and delicious treat to make at home? Look no further! We have some amazing recipes for homemade honey candies and gummy bears that are sure to satisfy your sweet tooth. And the best part? They are made with all-natural ingredients, so you can feel good about indulging in these tasty treats.
First up, we have honey candies. These little delights are made with just a few simple ingredients: sugar, honey, corn syrup, and water. The process is easy too. Just mix everything together in a pot, heat it up, and let it cool. Once cooled, you can wrap them up in clear plastic bags and tie them with colorful ribbons. They make the perfect gift or party favor. And if you have kids with braces, they can even use these candies as sweet tea stirrers!
Next, we have homemade gummy bears. These are a healthier alternative to the store-bought versions, which are often loaded with sugar and artificial ingredients. Our gummy bears are made with real fruits and vegetables and contain no refined sugar. They are a great way to sneak some extra nutrients into your kids’ diets. Plus, they are super easy to make. Just blend your favorite fruits and vegetables, add some gelatin, and pour the mixture into molds. Let them set, and you’ll have delicious and nutritious gummy bears ready to enjoy.
So why settle for store-bought candies when you can make your own at home? These homemade treats are not only healthier but also more fun to make. Get creative with different flavors and shapes, and let your imagination run wild. Your taste buds will thank you!
Note: The HTML tags in the article have not been changed.Check out these amazing homemade healthy gummies made with real fruits and vegetables! Packed with vitamins, minerals, and essential nutrients, these gummies are a guilt-free treat. Say goodbye to high fructose corn syrup and dangerous artificial dyes. With these gummies, it’s all about using fresh whole fruits and vegetables. Plus, you can get creative and add superfoods like chia seeds, ginger, probiotics, cod liver oil, or kale to your mix.
The quality of the gelatin is crucial for the success of this recipe. That’s why I recommend using gelatin made from 100% grass-fed animals. The collagen in this type of gelatin, along with its amino acids, helps regulate our metabolism, has anti-inflammatory properties, strengthens hair and nails, and balances hormones. Gelatin is also known for its ability to improve digestion.
Now, let’s get to the recipe for these homemade healthy gummies!
Ingredients for homemade healthy gummies:
– 1 1/2 cups of freshly squeezed fruit and/or vegetable juice (preferably cold-pressed for the best results) or store-bought juice (make sure it’s 100% juice and preferably not from concentrate). Smoothie blends work great too!
– 4 tablespoons of gelatin (grass-fed gelatin is preferred, but you can find plain gelatin near the flavored gelatin in your local supermarket. One tablespoon is usually equivalent to one gelatin packet, but to be sure, empty the packets into a container and use a spoon to measure).
– 2-4 tablespoons of raw honey, depending on your preference and how sweet your juice is. You can also use maple syrup or stevia. If your juice has a lot of vegetables, you might need more honey, but it depends on your personal taste.
– 1/2 teaspoon of vanilla extract (optional for extra flavor)
– Any other ingredients you want to incorporate, such as probiotics, elderberry syrup (for preventing or fighting a cold), or cod liver oil (immune system booster). Remember, you can turn these gummies into your natural multivitamins.
Instructions:
1. Pour the juice into a small or medium saucepan. Sprinkle the gelatin on top and let it sit for a few minutes until it starts to swell (it will look wrinkled on the surface, and all the white gelatin powder will be absorbed into the liquid). Once all the gelatin is absorbed, mix well.
2. Then, place the saucepan over medium heat on the stove. Let the liquid warm up, but don’t let it boil. Stir until all the gelatin dissolves and becomes smooth and liquid (at first, it will be grainy, but after a couple of minutes, it should dissolve completely).
3. Add the honey, vanilla extract, and any other ingredients you want to use.
4. Pour the liquid into a small container (I use my measuring cup) or into fun candy molds and refrigerate for about 2-3 hours.
5. Take out of the molds from the refrigerator. They should pop right out. If you used a loaf pan, cut the gelatin into small squares.
6. Keep your homemade healthy gummies in an airtight container in the refrigerator for about 2 weeks. If you leave them out, they will last, but I recommend storing them in the refrigerator.
Now, let’s talk about some ideas for juice combinations and colors:
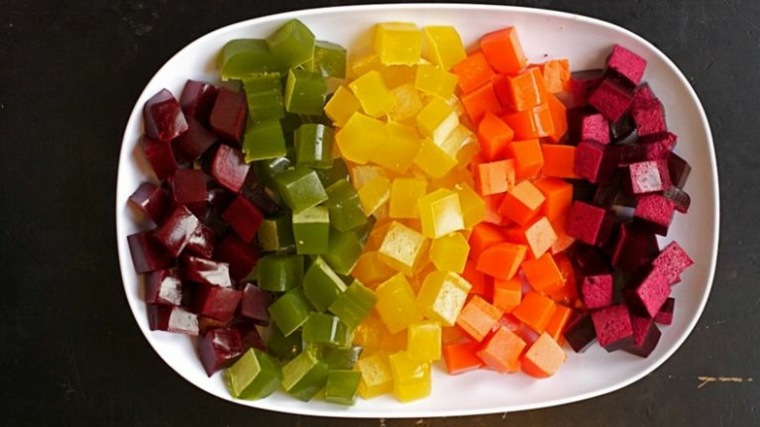
Kids love colorful gummies, so keep the following information in mind to prepare gummies as vibrant as the ones you find in stores:
– Red: beets, strawberries, raspberries, watermelon, red apples.
– Orange: carrots, oranges, clementines, mandarins, mangoes, papaya, peaches.
– Yellow: yellow pear, yellow apple, grapes (DO NOT use pineapple juice, as the enzyme bromelain in pineapple will prevent the gelatin from setting).
– Green: kale, spinach, green grapes, cucumbers, celery, green apple (DO NOT use kiwi, as the gelatin won’t set).
– Purple: purple cabbage, blackberries, blueberries, concord grapes.
So, get creative and enjoy these homemade healthy gummies that are not only delicious but also good for you!
Delicious Homemade Ginger Lollipops for Nausea Relief
If you want to change the colors and lighten up your healthy homemade gummies, you can also add a little milk to a portion of the juice in the recipe. If you don’t want to include dairy products in the recipe, you can use almond milk instead.
Ingredients:
1/4 cup apple cider vinegar
1/4 cup mint leaves
1/2 cup honey
1/4 teaspoon ginger powder

Instructions:
In a blender or food processor, place apple cider vinegar and mint. Blend for a few minutes until the mint is finely chopped.
Pour the mint vinegar mixture into a small pot. Add the honey and ginger and cook over low heat. Stir continuously and bring the honey to a boil. Cook until it reaches a temperature of 300 degrees F.
Drop a drop or two of honey into a cup of ice water. If the honey spins and holds its shape (like hard candies), then it’s ready. (Note: if you don’t have a candy thermometer, you can test until you reach this stage).
Pour into lollipop or candy molds if you have them. Don’t forget the sticks! If you don’t have molds, place the sticks on a greased non-stick surface, such as a silicone mat or parchment paper. Carefully pour the mixture over each stick, creating a free-form lollipop.
Let the lollipops cool to room temperature until they are hard.
It’s best to store these lollipops in the freezer in a glass jar. Strange, I know, but it eliminates the problem of sticky lollipops. Alternatively, you can also wrap them in wax paper and store at room temperature.
The recipe makes about 6 lollipops or candies.
