Ideas de juegos de bricolaje al aire libre para el verano
Ideas de juegos de bricolaje al aire libre para el verano
El verano es la temporada perfecta para disfrutar del aire libre y realizar actividades divertidas en familia. Si tienes niños en casa, una excelente forma de mantenerlos entretenidos es con juegos al aire libre que pueden construirse fácilmente con materiales que ya tienes en casa. A continuación, te presentamos algunas ideas de juegos de bricolaje para disfrutar al máximo el verano.
1. Carrera de obstáculos: Una actividad emocionante y llena de diversión para los más pequeños. Puedes crear una carrera de obstáculos en el jardín utilizando aros, cuerdas, conos y cualquier otro objeto que tengas a mano. Diseña un recorrido retador donde los niños tengan que saltar, correr y superar diferentes pruebas. ¡La carrera de obstáculos les asegurará horas de diversión y ejercicio!
2. Juego de anillas: Este juego es ideal para desarrollar la destreza y la coordinación. Reutiliza botellas de plástico vacías y píntalas de colores. Luego, corta el cuello de las botellas para formar los aros. Clávalos en el suelo formando un círculo y juega a lanzar pelotas intentando atravesar los aros. Puedes puntuar cada lanzamiento y convertirlo en una competencia familiar.
3. Pista de carreras en el jardín: Si tienes espacio suficiente en tu jardín, puedes crear una pista de carreras para autos de juguete. Usa cinta adhesiva de colores para marcar el circuito en el suelo y coloca obstáculos utilizando cartones o juguetes. Los niños podrán disfrutar de emocionantes carreras y desarrollar su imaginación al máximo.
4. Bolos caseros: ¿Por qué no construir tus propios bolos en el jardín? Utiliza botellas de plástico vacías y píntalas de diferentes colores. Luego, colócalas en forma de triángulo y utiliza una pelota para derribarlas. Puedes ajustar la dificultad del juego poniendo diferentes distancias entre los bolos y el punto de lanzamiento.
5. Juego de puntería: Este juego es perfecto para niños y adultos. Crea un tablero de puntería utilizando cartones y pinta diferentes áreas con valores de puntuación. Luego, lanza aros o pelotas intentando acertar en las áreas de mayor puntuación. Puedes competir en familia y establecer premios para el ganador.
Recuerda que la seguridad es primordial al realizar juegos al aire libre. Siempre supervisa a los niños y asegúrate de que estén utilizando los materiales de manera correcta. Además, no olvides hidratarte y protegerte del sol durante las actividades al aire libre.
Estas ideas de juegos de bricolaje al aire libre para el verano seguro mantendrán a tus niños entretenidos y activos durante toda la temporada. ¡Aprovecha al máximo el buen clima y diviértete en familia! 1. Juego de béisbol casero: Crea una zona de bateo en tu jardín usando una pelota de béisbol y un palo de escoba como bate. Marca bases en el suelo con cintas adhesivas y juega un partido de béisbol con los niños. Puedes incluso organizar un campeonato con otros familiares y amigos.
2. Juego de dardos: Crea un tablero de dardos gigante en tu jardín utilizando una lona, pintura y aros de hula-hula. Pinta diferentes áreas con valores de puntuación y lanza los aros para intentar acertar en el centro. Puedes jugar individualmente o en equipos.
3. Juego de bolos de agua: Llena botellas de plástico vacías con agua y coloca luces led dentro de ellas para que brillen en la oscuridad. Luego, colócalas en forma de triángulo en el jardín y utiliza una pelota para derribarlas. Este juego es ideal para las noches de verano.
4. Juego de carreras de agua: Crea una pista de carreras de agua en tu jardín utilizando lonas, mangueras y agua. Haz pequeñas rampas con las lonas y coloca mangueras para que haya agua corriendo por ellas. Los niños podrán deslizarse por la pista de agua y competir en carreras emocionantes.
5. Juego de tiro al blanco con globos: Llena globos de agua y cuélgalos en una cuerda utilizando pinzas de ropa. Luego, utiliza pistolas de agua para tratar de explotar los globos. Este juego es perfecto para refrescarse en los días calurosos de verano.
Recuerda siempre adaptar los juegos a la edad de los niños y tener en cuenta las medidas de seguridad necesarias. ¡Disfruta del verano al aire libre con estos divertidos juegos de bricolaje! 6. Juego de croquet casero: Crea tu propio campo de croquet en el jardín utilizando palos, aros y pelotas. Marca los recorridos con cintas adhesivas o utiliza conos como obstáculos. Los niños podrán disfrutar de este juego clásico al aire libre y desarrollar su habilidad de golpeo.
7. Juego de pesca magnética: Llena una piscina inflable con agua y coloca diferentes juguetes con imanes en el fondo. Crea cañas de pescar caseras utilizando palos, cuerdas y imanes en los extremos. Los niños tendrán que pescar los juguetes utilizando sus cañas y suerte. ¡Un juego divertido y refrescante para los días calurosos!
8. Juego de salto de cuerda: Organiza un concurso de saltos de cuerda en el jardín utilizando cuerdas largas. Los niños podrán competir en diferentes categorías según la cantidad de saltos que pueden hacer o la dificultad de los movimientos. También puedes agregar música para hacerlo más divertido.
9. Juego de lanzamiento de globos de agua: Llena globos de agua y organiza una competencia de lanzamiento. Los niños deberán lanzarse los globos de agua entre sí tratando de atraparlos sin que se rompan. ¡Un juego lleno de risas y salpicaduras!
10. Juego de búsqueda del tesoro: Crea un mapa del tesoro con pistas y esconde diferentes objetos en el jardín. Los niños deberán seguir las pistas hasta encontrar el tesoro escondido. Puedes agregar desafíos adicionales en el camino para hacerlo más emocionante.
Recuerda siempre adaptar los juegos a la edad de los niños y tener en cuenta las medidas de seguridad necesarias. ¡Disfruta del verano al aire libre con estos divertidos juegos de bricolaje! 11. Juego de pintura al aire libre: Utiliza pinturas lavables y un lienzo grande o cartulina para que los niños puedan expresar su creatividad al aire libre. Pueden pintar paisajes, personajes o lo que deseen. Además, esta actividad les permite mejorar su coordinación motora y su capacidad de concentración.
12. Juego de fútbol con globos: Infla globos y úsalos como balones de fútbol. Arma dos equipos y jueguen un partido divertido en el jardín. El desafío adicional de controlar el balón más liviano añade una nueva dimensión al juego.
13. Juego de malabares: Aprender a hacer malabares es una actividad divertida y desafiante. Puedes enseñar a tus hijos a hacer malabares con pelotas, pañuelos o incluso con naranjas. Es una forma divertida de mejorar la coordinación y la concentración.
14. Juego de tiro al arco: Crea tu propio arco y flechas utilizando ramas, cuerda y palitos afilados. Instala una diana en un lugar seguro y desafía a los niños a probar su puntería. Es importante recordar que este juego debe ser supervisado por un adulto y siempre se deben tomar precauciones de seguridad.
15. Juego de construcción con bloques: Utiliza bloques de madera o cartón para construir diferentes estructuras en el jardín. Pueden ser castillos, puentes, casas, lo que la imaginación les dicte. Este juego no solo fomenta la creatividad, sino también el trabajo en equipo y la resolución de problemas.
16. Juego de voleibol de playa: Si tienes acceso a una playa o a una piscina con arena, organiza un partido de voleibol casero. Puedes improvisar una red utilizando cuerdas y palos. Este juego es perfecto para disfrutar en familia o con amigos durante un día soleado.
Recuerda que la diversión y la seguridad deben ir de la mano durante estos juegos al aire libre. Asegúrate de que todos los participantes sigan las reglas y tomen las precauciones necesarias para evitar accidentes. ¡Disfruta del verano y de la creatividad que los juegos de bricolaje al aire libre pueden brindar! Estas son algunas ideas emocionantes y divertidas para juegos de bricolaje al aire libre para los más pequeños:
1. Carrera de obstáculos: Diseña un recorrido desafiante con aros, cuerdas, conos y otros objetos que tengas a mano. Los niños correrán, saltarán y superarán diferentes pruebas en esta carrera de obstáculos.
2. Juego de anillas: Pinta botellas de plástico vacías de colores y córtalas en forma de aros. Clávalos en el suelo y juega a lanzar pelotas tratando de atravesar los aros. Puedes convertirlo en una competencia familiar.
3. Pista de carreras en el jardín: Crea un circuito en el suelo con cinta adhesiva de colores y coloca obstáculos con cartones o juguetes. Los niños podrán disfrutar de emocionantes carreras de autos de juguete.
4. Bolos caseros: Utiliza botellas de plástico vacías como bolos y una pelota para derribarlos. Ajusta la dificultad del juego colocando diferentes distancias entre los bolos y el punto de lanzamiento.
5. Juego de puntería: Crea un tablero de puntería con cartones y pinta diferentes áreas con valores de puntuación. Lanza aros o pelotas intentando acertar en las áreas de mayor puntuación. Puedes competir en familia y establecer premios para el ganador.
Asegúrate de supervisar a los niños y de que utilicen los materiales de manera segura. No olvides hidratarte y protegerte del sol durante las actividades al aire libre.
Estas son algunas ideas adicionales para juegos de bricolaje al aire libre para el verano:
6. Juego de béisbol casero: Crea una zona de bateo en tu jardín usando una pelota de béisbol y un palo de escoba como bate. Marca bases en el suelo y juega un partido de béisbol con los niños.
7. Juego de dardos: Crea un tablero de dardos gigante en tu jardín utilizando una lona, pintura y aros de hula-hula. Pinta diferentes áreas con valores de puntuación y lanza los aros para intentar acertar en el centro.
8. Juego de bolos de agua: Llena botellas de plástico vacías con agua y colócalas en forma de triángulo en el jardín. Utiliza una pelota para derribarlos. Este juego es ideal para las noches de verano.
9. Juego de carreras de agua: Crea una pista de carreras de agua en tu jardín utilizando lonas, mangueras y agua. Los niños podrán deslizarse por la pista de agua y competir en carreras emocionantes.
10. Juego de tiro al blanco con globos: Llena globos de agua y cuélgalos en una cuerda utilizando pinzas de ropa. Luego, utiliza pistolas de agua para tratar de explotar los globos.
Recuerda adaptar los juegos a la edad de los niños y tener en cuenta las medidas de seguridad necesarias. ¡Diviértete al máximo con estos juegos de bricolaje al aire libre!
 Are you looking for some fun DIY projects that will not only entertain you but also teach you new techniques? Well, we have just the thing for you! These DIY games are not only a great way to spend your free time, but they also offer unique outdoor fun for the whole family.
So, as you can see, these DIY projects have many benefits for everyone involved. All you need to get started are a few materials and tools that you can easily find at any craft store, some enthusiasm, and most importantly, a little bit of free time. But trust us, the efforts you put in will definitely be worth it, and you’ll want to continue with the next project.
Knowing all this, we have selected some easy DIY projects for outdoor games that will make your family’s summer even more fun and enjoyable. So, let’s not waste any more time and get to work, friends!
Outdoor DIY Games
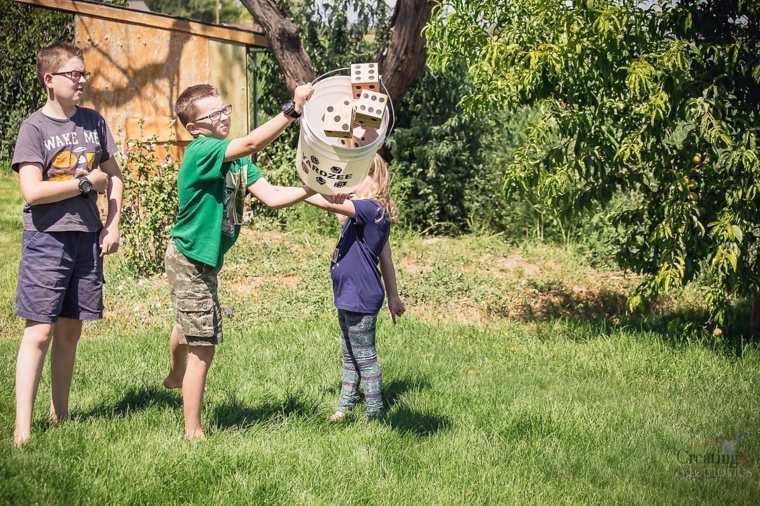
Throwing Game
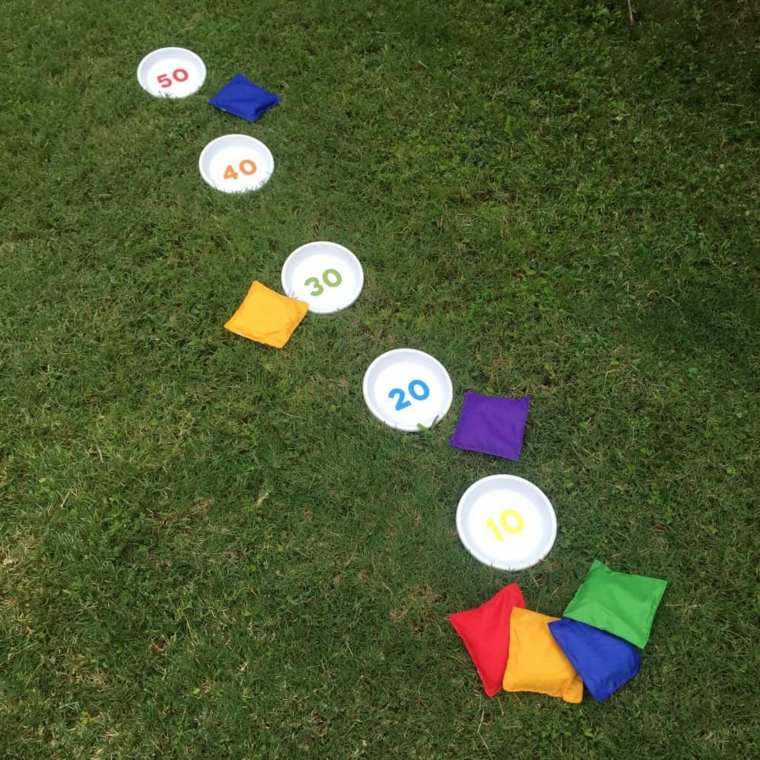
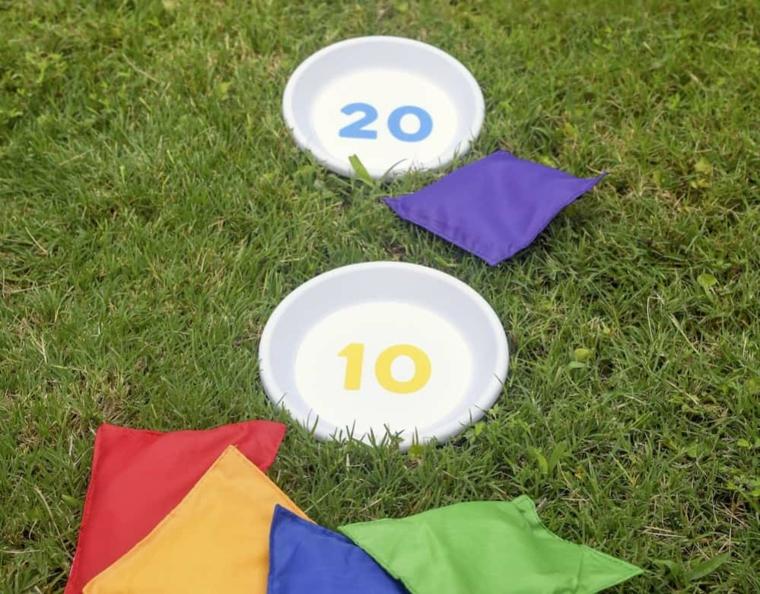
The first game we have for you is a DIY bean bag throwing game with clay plates and printed numbers. This bean bag game is easy to make and loads of fun!
Required Skills: Beginner level. You will paint, cut out a print, and glue it onto clay plates with adhesive. It’s super easy!
This bean bag game is so easy to make that you’ll be having fun in just a few minutes. Kids can also help in the process before playing. It can be played with any number of players of all ages. And once everyone gets the hang of it, you can even organize a real bean bag throwing tournament.
How to Make DIY Bean Bags
Buy pieces of different colored cotton fabric (preferably knit) to sew the bags and medium-sized beans. Sew the bean bags in a square shape and size of 5″ x 5″ (about 12 cm). Cut the squares with 1 inch larger than the size of the finished bags and use a double stitch or zigzag to reinforce them.
Each bag should contain approximately 1-3/4 cups of beans to weigh between 15-16 oz.
How to Make Scoring Plates?
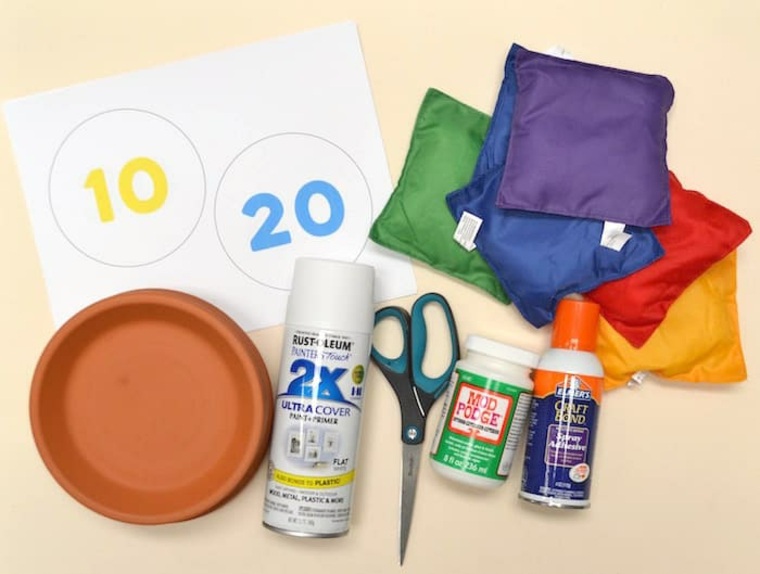
Materials:
Printer and paper
8″ clay plates, buy five or six if you want to mark values up to 100 points
Spray paint – white
Scissors
Spray adhesive
Paintbrush
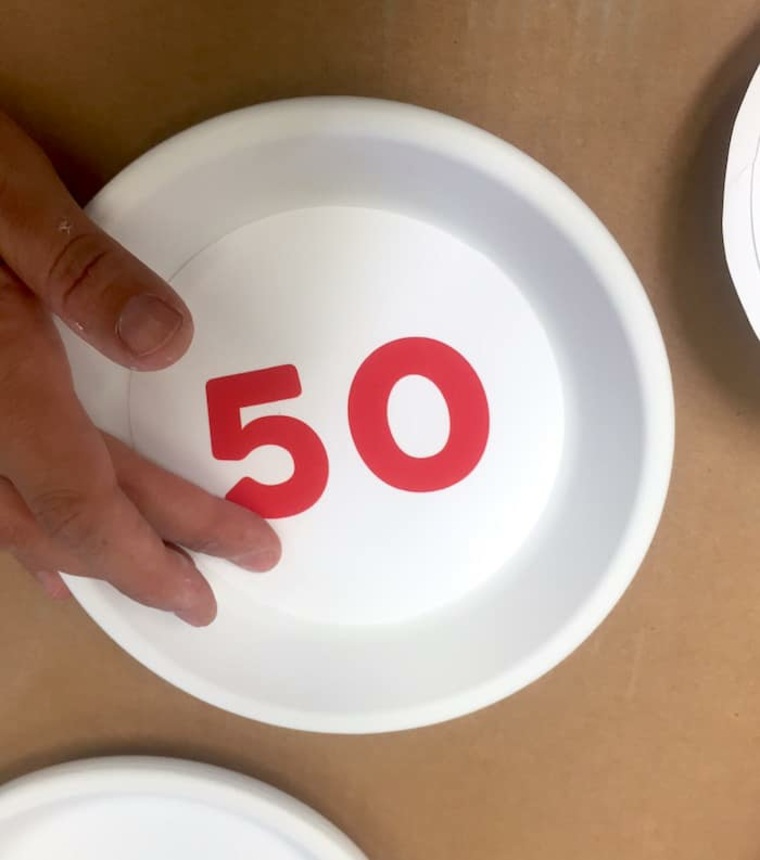
Spray paint the plates. Cover your work surface with protective paper.Looking to add some fun to your summer? Why not try this DIY throwing game? It’s a great way to spend time outdoors and challenge yourself. Plus, it’s super easy to make!
First, gather your materials. You’ll need some clay dishes, paint (either acrylic or spray paint), and adhesive numbers. If you’re using spray paint, make sure to apply it in a well-ventilated area.
Start by placing the clay dishes upside down and evenly applying the paint. Let them dry for at least 20 minutes before flipping them over and repeating the process. Keep doing this until both sides of the dishes are evenly covered and completely dry.
If you have acrylic paint on hand, feel free to use that instead of spray paint. It works just as well!
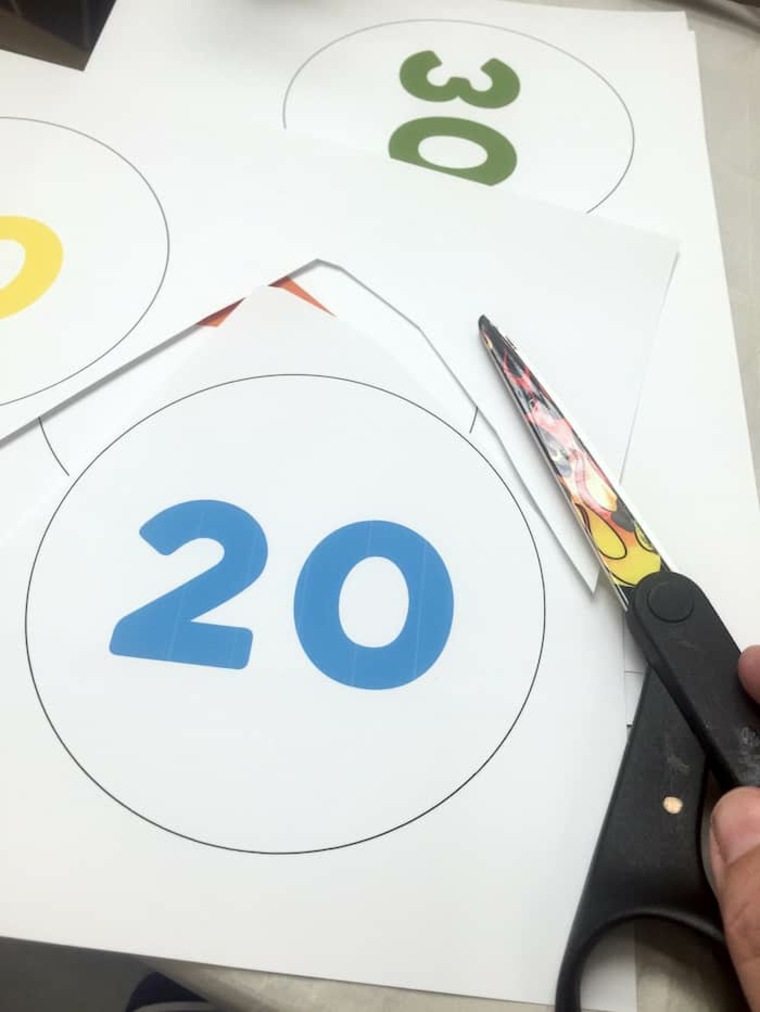
Once the paint is dry, print out the numbers on durable paper and cut them into circles. Glue them onto the dishes. You can assign different point values to each dish, ranging from 10 to 100 points. Get creative and make your own scoring system!
Now it’s time to play! Take your DIY throwing game to the backyard and place the dishes as far apart as you’d like. As you get better, you can increase the distance between them. You’ll find it’s a fun and challenging game that will keep you entertained for hours. You can even invite your friends or neighbors to join in for some friendly competition.
Looking for more DIY games to enjoy this summer? Check out our other projects, like the outdoor football toss game. It’s the perfect gift idea for Father’s Day!
To make the football toss game, you’ll need some cedar boards, screws, hinges, rope, and a few other tools. Follow the simple tutorial to build your own game. It’s a great way to bond with your dad and have some fun in the sun.
Remember, using cedar boards instead of traditional pine boards will ensure that your game can withstand the elements without any additional paint. Plus, cedar is a beautiful wood on its own.
So grab your tools and get ready to have a blast this summer with these DIY games. Whether you’re throwing clay dishes or tossing a football, you’re sure to create lasting memories with your loved ones. Happy gaming!Get ready for some extreme DIY fun! In this article, we’ll show you how to create two awesome outdoor games that will keep you entertained all summer long. So grab your tools and let’s get started!
First up, we have a DIY football toss game. To make this game, you’ll need some plywood, nails, a pencil, and a saw. Start by measuring 4 inches from the edge of the board and mark it with a pencil. This will be the pivot point for your game. Now, measure 8 inches from the pivot point and draw a circle around it. Repeat this process, but this time measure 9 inches up from the bottom of the board and draw a circle with a diameter of 12 inches. Once you have your circles drawn, it’s time to connect the boards using screws and wood glue. Make sure to let the glue dry before moving on to the next step.
Next, it’s time to cut the holes for the game. Place your newly created board on a sturdy surface with nothing underneath the circles. Using a drill and a saw blade, drill a hole on the inner edge of the circle big enough to fit a saw blade. Then, use a jigsaw to cut out the circles. Be careful and take your time to ensure a clean cut.
Now, let’s build the frames for the game. Use the cedar boards to create two frames. Once the frames are built, add the front panel using the 5 1/2-inch boards. Cut holes between the 3 1/2-inch boards and connect them with wood glue and nails. This will create the target area for the game.
With the frames complete, it’s time to install the hinges. Place the front and back frames face down with the tops together and attach the hinges. This will allow the game to fold up for easy storage and transportation.
Now, it’s time to sand the game. Cedar fence boards can be rough, so start with a coarse sandpaper and gradually work your way up to a fine grit sandpaper for a smooth finish.
And there you have it! Your DIY football toss game is complete. Now, it’s time to enjoy the game. Create your own rules or simply try to toss the football through the holes. It’s a great way to have fun and stay active outdoors during the summer.
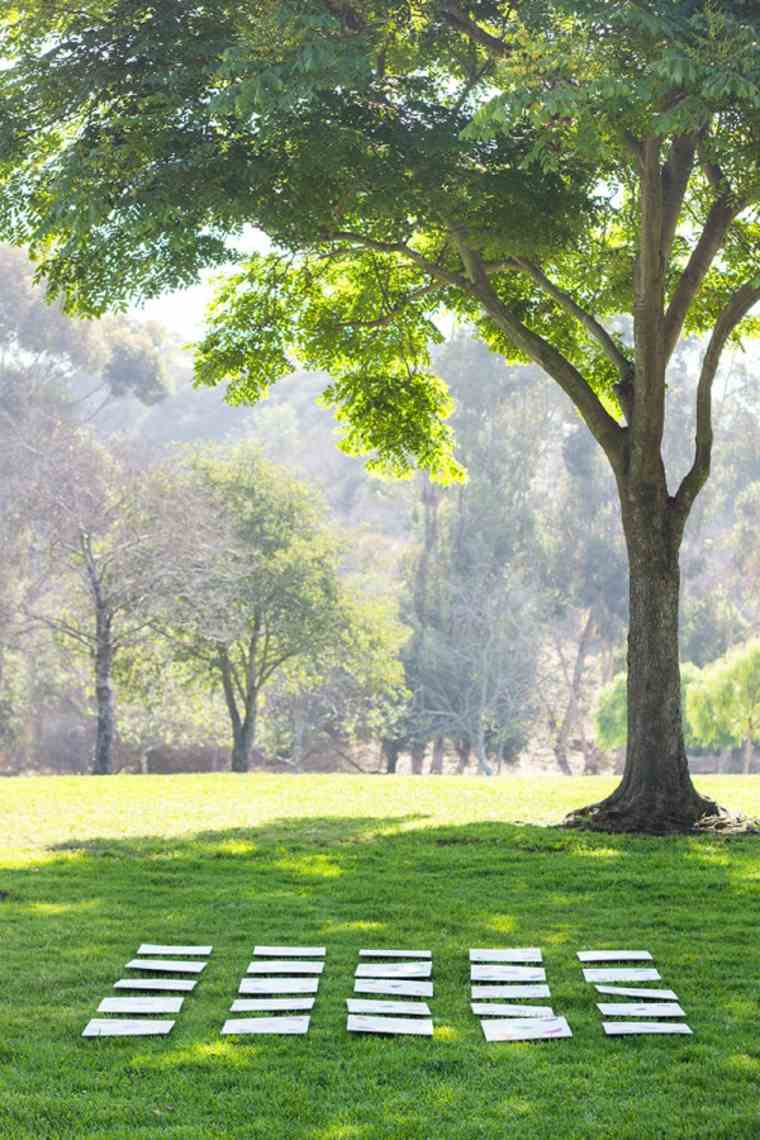
But wait, there’s more! We also have another exciting DIY game for you to try. It’s called the giant memory game. This game is perfect for backyard play, family picnics, or even beach trips. And the best part is, it’s completely reusable.
To make the giant memory game, you’ll need cork tiles, spray paint, printable templates, cardboard, an X-Acto knife, painter’s tape, and some protective covering for your workspace.
Start by covering your outdoor workspace with protective covering. Spray paint the cork tiles on one side with white spray paint. Let them dry, and then repeat the process on the other side.
While the tiles are drying, go ahead and print out the free printable templates on cardstock. These templates include 12 symbols, a bonus tile, and a shape for marking the back of the tiles.
Once the tiles are dry, use an X-Acto knife to cut out the symbols from the templates. Place the templates on top of the cork tiles and use painter’s tape to secure them in place. Then, use a pencil to trace the symbols onto the tiles.
And there you have it! Your giant memory game is complete. Now, it’s time to have some fun. Flip the tiles over and take turns trying to match the symbols. It’s a great way to test your memory skills and have a blast outdoors.
So there you have it, two awesome DIY games to enjoy outdoors. Whether you’re tossing a football or testing your memory, these games are sure to provide hours of entertainment. So gather your friends and family, and let the games begin!Cutting all your templates. To do this, cut the edges of the black silhouettes with an x-acto knife and remove the shapes to keep the patterns. For each tile, choose one of the symbols and tape the template, making sure to cover any exposed white space with tape. Spray the template with your color of choice. Apply each of the patterns to two tiles and paint them the same color.
Painting the backs of the tiles
For the back of the template, cut the lemon wedge shape on the last sheet of cardboard several times at random. Use an x-acto knife to cut out the shapes, creating a template.
Place the template on top of each tile (the dimensions will fit perfectly and there is no need to tape here) and carefully spray each shape with a different color to achieve the look you see in the photos. Let it dry.
It is really important to let the tiles dry before stacking and using them. Make sure the stickiness is gone and the paint is completely cured.
To play, align the tiles in a 5 by 5 square. If someone flips the tile “one more time,” they get an extra turn and then that tile is removed from the game. If you are playing with younger children (read: less patient), you can choose to play with only 16 tiles (using 8 symbols) for a smaller and easier game.
Memory games are really great because people of all ages love them, and this is a wonderful way to take this board game outside in the open air.
And if you have a good friend who has invited you to a party, this would be an amazing gift to bring to a backyard barbecue. And if you don’t want younger children to jump on the spray paint, you could easily offer them to paint some tiles for their own DIY versions.
In this project, cork tiles are used to make the memory game reusable and last summer after summer. But if you just want to make a one-time use game or if you are looking for a less expensive option, you can print the symbols on cardboard or trace them on cardboard and paint them.
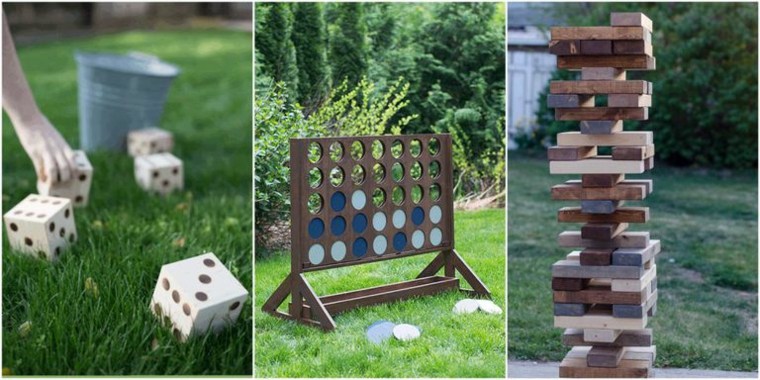
DIY dice game “Yahdzee”
You will need:
5 4×4 wooden cubes
1 large chalkboard …
A cube to roll the dice (optional)
Wood burner or thick black marker
The “Yahdzee” game can be played individually or in teams. It does not require physical skills and is suitable for people of all ages. The only preparation players need to play this game is a little good humor to have fun playing.
However, if played on the lawn, it can be dIt’s hard to guess which number has fallen because the surface is not flat. That’s why it’s better to choose a flat site with pavement to roll the dice. You can also cover the playing area with a carpet to make the dice roll more smoothly.
If you don’t have a scorecard at home for the game of “Yahtzee” to copy, you can find an example and the rules at Yahtzee Scoring and print them.

Scoring
If you don’t have ready-made wooden cubes to buy, you can make them yourself with an electric saw at home. When you have the cubes ready, create dice using a wood burner or simply a marker to add the points on each side.
Use a whiteboard to create a large scorecard that all players can see. I used markers for the lines and score details. Then use a whiteboard marker for the players’ actual score during the game. This way, you’ll have a reusable scoreboard for many games of “Yahtzee” in the garden throughout the summer.
This has been the latest DIY game we offer in this article. We hope you like our outdoor DIY game ideas for the summer and find them useful for spending many enjoyable hours in your gardens with your family and friends.