Columpios para jardín – 5 tutoriales detallados de columpios DIY
Columpios para jardín – 5 tutoriales detallados de columpios DIY
Los columpios para jardín son una excelente adición para cualquier espacio al aire libre. No solo ofrecen diversión y entretenimiento para niños y adultos por igual, sino que también añaden un toque encantador a la decoración de tu jardín. Si estás buscando ahorrar dinero y disfrutar de un proyecto DIY, te presentamos cinco tutoriales detallados para construir tus propios columpios.
1. Columpio de neumático:
Un columpio de neumático es una opción clásica y económica. Para construirlo, necesitarás un neumático usado, cuerda resistente, pintura y una tabla de madera. Comienza limpiando y pintando el neumático. Luego, perfora cuatro agujeros equidistantes en la tabla de madera y ata la cuerda a cada agujero. Finalmente, pasa la cuerda por el centro del neumático y cuélgalo en un árbol fuerte.
2. Columpio de palets:
Los palets son una opción versátil y sostenible para construir un columpio. Necesitarás dos palets, una tabla de madera resistente, cuerda y herramientas básicas de bricolaje. Desmonta un palet y úsalo para construir el respaldo y los laterales del asiento. Luego, fija la tabla de madera resistente para el asiento y ata la cuerda para colgar el columpio de un árbol o estructura sólida.
3. Columpio de madera clásico:
Este tutorial es ideal para aquellos con habilidades básicas de carpintería. Necesitarás madera resistente, herramientas para cortar y dar forma a la madera, tornillos y cuerda. Diseña el asiento y respaldo según tus preferencias y corta la madera en las dimensiones deseadas. Luego, ensambla las partes con tornillos y ata la cuerda para colgar el columpio.
4. Columpio de tela colgante:
Este columpio es ideal para espacios pequeños. Necesitarás una sábana o tela resistente, un aro de metal, cuerda y una rama fuerte. Cose la tela para formar un asiento y ata la cuerda a cada esquina. Luego, pasa la cuerda a través del aro de metal y cuélgalo del árbol o estructura.
5. Columpio de llanta:
Si tienes una llanta vieja, este tutorial es perfecto para ti. Necesitarás una llanta usada, cuerda resistente y una tabla de madera. Limpia y pinta la llanta si lo deseas, luego perfora cuatro agujeros equidistantes en la tabla de madera y ata la cuerda en cada agujero. Pasa la cuerda por el centro de la llanta y cuélgalo en un árbol o estructura sólida.
Recuerda siempre seguir las instrucciones de seguridad al construir tus propios columpios. Verifica que las estructuras estén firmes y los materiales estén en buen estado. ¡Disfruta de horas de diversión en tu jardín con estos increíbles columpios DIY! Construir tus propios columpios para jardín puede ser un proyecto gratificante y divertido. Te presentamos cinco tutoriales detallados para ayudarte a crear columpios únicos y personalizados:
1. Columpio de neumático: Este es un clásico económico. Limpia y pinta un neumático usado, perfora cuatro agujeros equidistantes en una tabla de madera y ata la cuerda a cada agujero. Pasa la cuerda por el centro del neumático y cuélgalo en un árbol fuerte.
2. Columpio de palets: Utiliza dos palets desmontados para construir el respaldo y los laterales del asiento. Fija una tabla de madera resistente como asiento y ata la cuerda para colgar el columpio.
3. Columpio de madera clásico: Si tienes habilidades básicas de carpintería, este tutorial es para ti. Corta y da forma a la madera resistente para el asiento y respaldo según tus preferencias. Ensambla las partes con tornillos y ata la cuerda para colgar el columpio.
4. Columpio de tela colgante: Ideal para espacios pequeños, cose una sábana o tela resistente para formar un asiento y ata la cuerda a cada esquina. Pasa la cuerda a través de un aro de metal y cuélgalo del árbol o estructura.
5. Columpio de llanta: Si tienes una llanta vieja, este tutorial es perfecto. Limpia y pinta la llanta, perfora cuatro agujeros equidistantes en una tabla de madera y ata la cuerda en cada agujero. Pasa la cuerda por el centro de la llanta y cuélgalo en un árbol o estructura sólida.
Recuerda siempre seguir las instrucciones de seguridad al construir tus propios columpios. Verifica que las estructuras estén firmes y los materiales estén en buen estado. ¡Disfruta de horas de diversión en tu jardín con estos increíbles columpios DIY! Los columpios para jardín son una excelente adición para cualquier espacio al aire libre. No solo ofrecen diversión y entretenimiento para niños y adultos por igual, sino que también añaden un toque encantador a la decoración de tu jardín. Si estás buscando ahorrar dinero y disfrutar de un proyecto DIY, te presentamos cinco tutoriales detallados para construir tus propios columpios.
1. Columpio de neumático:
Un columpio de neumático es una opción clásica y económica. Para construirlo, necesitarás un neumático usado, cuerda resistente, pintura y una tabla de madera. Comienza limpiando y pintando el neumático. Luego, perfora cuatro agujeros equidistantes en la tabla de madera y ata la cuerda a cada agujero. Finalmente, pasa la cuerda por el centro del neumático y cuélgalo en un árbol fuerte.
2. Columpio de palets:
Los palets son una opción versátil y sostenible para construir un columpio. Necesitarás dos palets, una tabla de madera resistente, cuerda y herramientas básicas de bricolaje. Desmonta un palet y úsalo para construir el respaldo y los laterales del asiento. Luego, fija la tabla de madera resistente para el asiento y ata la cuerda para colgar el columpio de un árbol o estructura sólida.
3. Columpio de madera clásico:
Este tutorial es ideal para aquellos con habilidades básicas de carpintería. Necesitarás madera resistente, herramientas para cortar y dar forma a la madera, tornillos y cuerda. Diseña el asiento y respaldo según tus preferencias y corta la madera en las dimensiones deseadas. Luego, ensambla las partes con tornillos y ata la cuerda para colgar el columpio.
4. Columpio de tela colgante:
Este columpio es ideal para espacios pequeños. Necesitarás una sábana o tela resistente, un aro de metal, cuerda y una rama fuerte. Cose la tela para formar un asiento y ata la cuerda a cada esquina. Luego, pasa la cuerda a través del aro de metal y cuélgalo del árbol o estructura.
5. Columpio de llanta:
Si tienes una llanta vieja, este tutorial es perfecto para ti. Necesitarás una llanta usada, cuerda resistente y una tabla de madera. Limpia y pinta la llanta si lo deseas, luego perfora cuatro agujeros equidistantes en la tabla de madera y ata la cuerda en cada agujero. Pasa la cuerda por el centro de la llanta y cuélgalo en un árbol o estructura sólida.
Recuerda siempre seguir las instrucciones de seguridad al construir tus propios columpios. Verifica que las estructuras estén firmes y los materiales estén en buen estado. ¡Disfruta de horas de diversión en tu jardín con estos increíbles columpios DIY! Aquí tienes cinco tutoriales detallados para construir tus propios columpios de jardín:
1. Columpio de neumático:
– Limpia y pinta un neumático usado.
– Perfora cuatro agujeros equidistantes en una tabla de madera.
– Ata la cuerda a cada agujero.
– Pasa la cuerda por el centro del neumático y cuélgalo en un árbol fuerte.
2. Columpio de palets:
– Desmonta dos palets y utiliza las partes para construir el respaldo y los laterales del asiento.
– Fija una tabla de madera resistente como asiento.
– Ata la cuerda para colgar el columpio de un árbol o estructura sólida.
3. Columpio de madera clásico:
– Corta y da forma a la madera resistente para el asiento y respaldo según tus preferencias.
– Ensambla las partes con tornillos.
– Ata la cuerda para colgar el columpio.
4. Columpio de tela colgante:
– Cose una sábana o tela resistente para formar un asiento.
– Ata la cuerda a cada esquina de la tela.
– Pasa la cuerda a través de un aro de metal y cuélgalo del árbol o estructura.
5. Columpio de llanta:
– Limpia y pinta una llanta vieja si lo deseas.
– Perfora cuatro agujeros equidistantes en una tabla de madera.
– Ata la cuerda en cada agujero.
– Pasa la cuerda por el centro de la llanta y cuélgala en un árbol o estructura sólida.
Recuerda siempre seguir las instrucciones de seguridad al construir tus propios columpios. Verifica que las estructuras estén firmes y los materiales estén en buen estado. ¡Disfruta de horas de diversión en tu jardín con estos increíbles columpios DIY!
In today’s digital age, children are often obsessed with electronic devices when it comes to playing games, leaving behind outdoor activities. However, a good swing can capture a child’s attention while also ensuring their mental and physical development by allowing them to spend time outdoors.
Garden Swings – 5 Detailed Tutorials

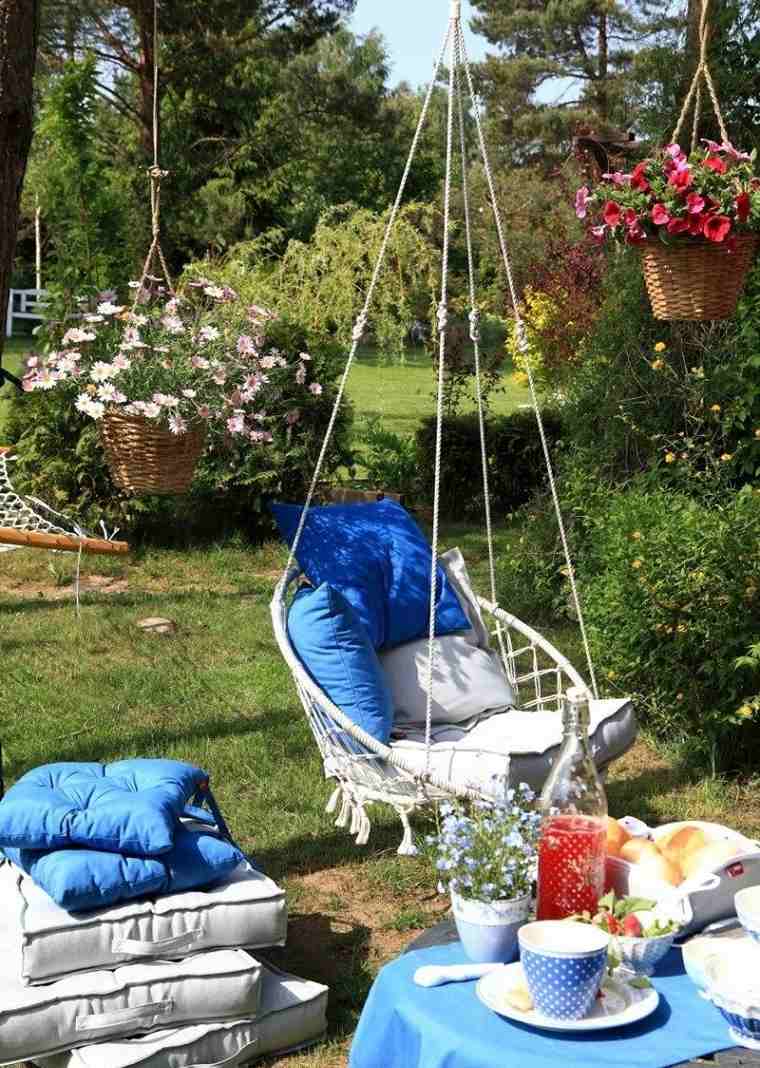
And what could be better than building a DIY swing at home and customizing it to get exactly what your child would love? Swings give us a sense of escape, ease, and freedom. For children, this is entertainment, for parents: a way to relax.
Garden Swings – 5 Tutorials to Make a Swing at Home

Where can little ones truly have fun? Outdoors, of course. You can make garden swings to suit all tastes and ages. Get inspired by examples from our collection of garden swing tutorials.
Garden Swings – 5 Easy Tutorials

Next up, some tutorials on how to make garden swings for children that bring even more joy to your garden!
Garden Swings – 5 Tutorials Using Different Materials
If going to the park is not an option for you because you know you’ll be sitting on a bench listening to 40 children screaming “Mom, Dad,” then you’ll do anything to avoid it, even creating a mini park in your own backyard where you can sit, have tea, and watch your children play. Kids love the park and spend one or two hours there every day. But if you have a garden and can create a park in it, you’ll only need to go to the park once or twice a week. It’s beautiful, functional, and, best of all, allows your child to have fun for an extended period.
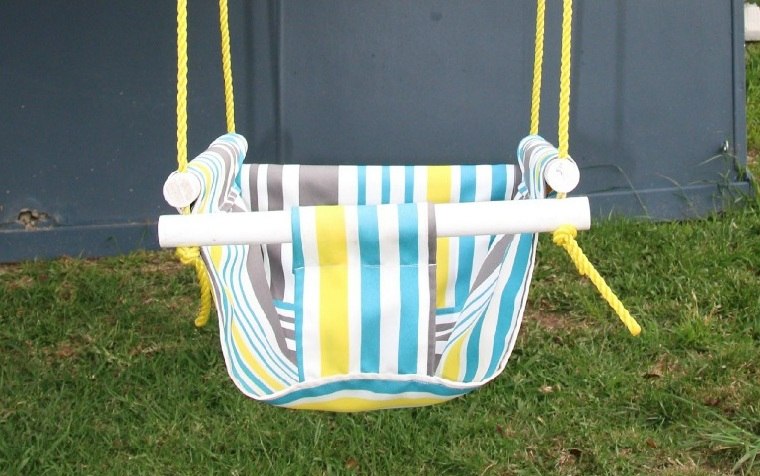
Garden Swings for Babies

You will need:
Fabric: Get approximately 2 meters of denim or upholstery fabric. It needs to withstand a lot of swinging.
Fabric or quilt batting: Approximately 1 meter of lightweight fabric to fill the fabric and make it slightly firmer.
Rope: You will need about 5 meters of rope depending on the height you want for the swing. You can use braided marine rope with a breaking strength of 650 kg, so it should hold up for most small children.
Wooden dowel: 1.6m length of 19mm wooden dowel will work perfectly.
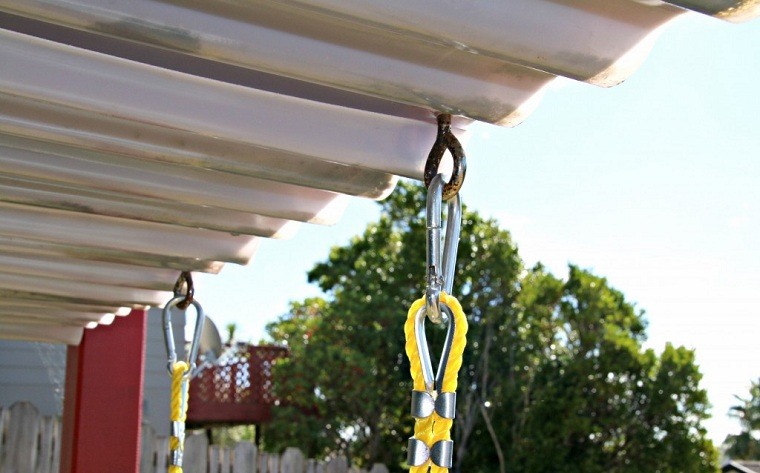
Two steel carabiners: Make sure to get ones that can hold the weight of your child.
Two steel hooks (eye screws) to hang the swing from the ceiling. Again, go as sturdy as you can. Watching your child fly through the backyard when the hardware fails is not as entertaining as it sounds.
Two thick zip ties to secure the rope in place.
You will also need (and know how to use): A sewing machine. A circular saw.

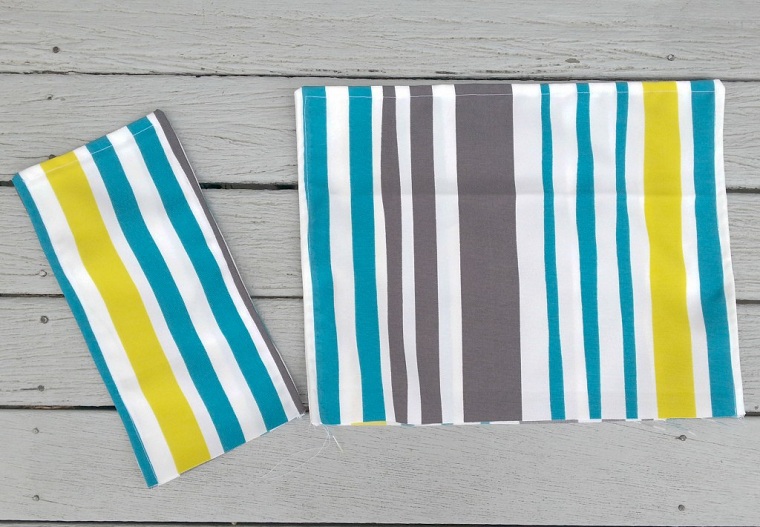
Let’s get started with the sewing:
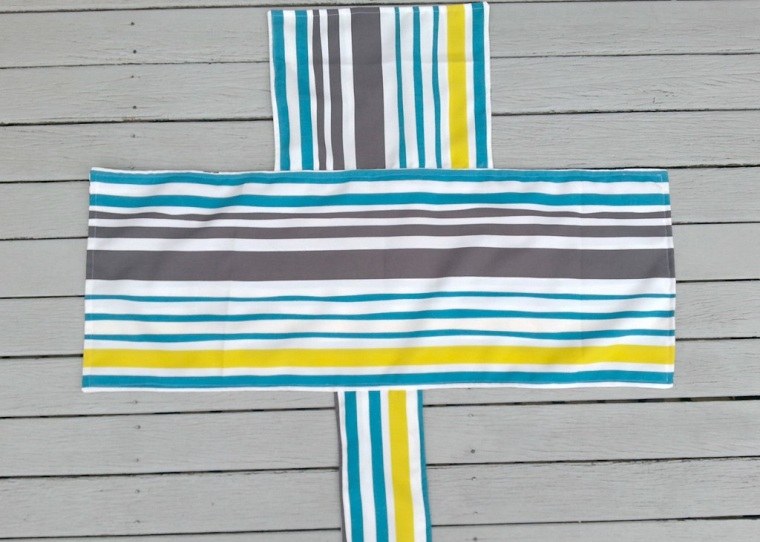
Cut the fabric into three pieces: two 92 cm by 36 cm rectangles, two 36 cm by 28 cm rectangles, and two 28 cm by 15 cm rectangles. If you’re using a striped fabric, it will look best to have the stripes on the larger piece going in one direction, and the stripes on the smaller pieces going in the opposite direction.
Take the two smaller sets of rectangles and place them right (print/pattern) sides together. With a seam allowance of about 9 cm, sew together on three sides, leaving one side of 14″ and another side of 6″ open. Trim the two fully sewn corners to create space and turn it right side out.
Find the center of one of the larger pieces – 92 cm by 36 cm – and place the open end of the 36 cm by 28 cm piece centered on one side, and the open end of the 28 cm by 15 cm piece centered on the other side. Pin in place. Place the other larger rectangle – 92 cm by 36 cm piece – face down and gather everything together. Sew along the edge, leaving an opening of about 20 cm on one of the shorter sides.

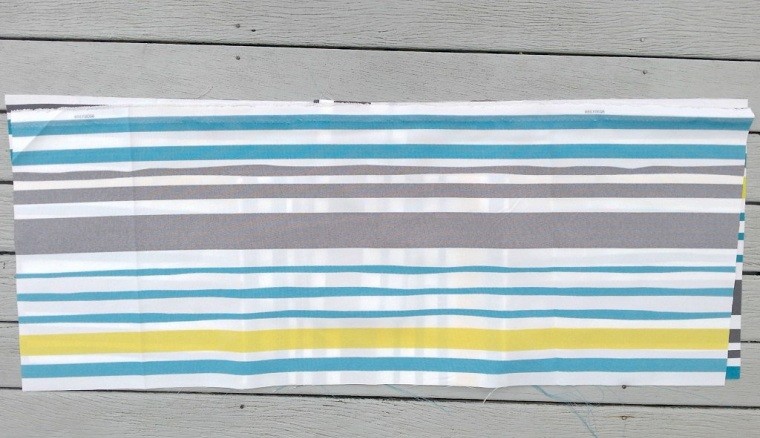
Trim the 4 corners and make sure all corners are sharp by running your finger along the interior seams to ensure the fabric is fully turned. Place the fabric inside out through the opening you left to match up the rest of the edges.
Now it’s time for some DIY!
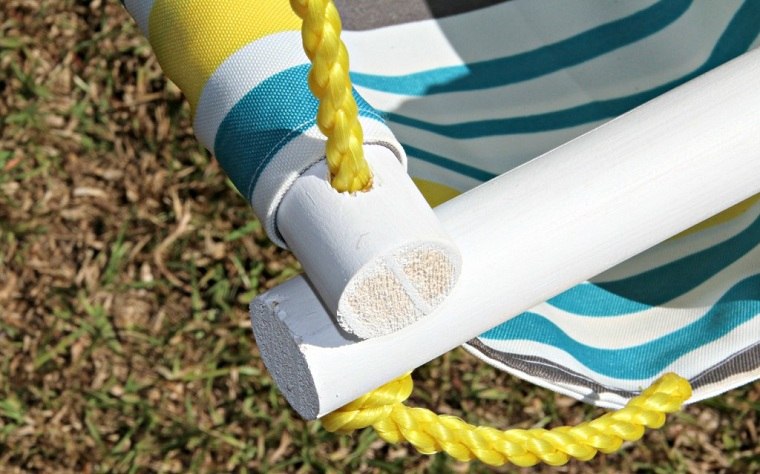
For this particular project, you can use a jigsaw and a drill, however, any saw will work just as well as a regular drill. Cut 4 points measuring 4 cm by 40 cm and sand the ends; this is just personal preference. On the 4 rods, drill a 1 cm hole about 2.5 cm from both ends. Take the rope and thread it through the holes. Attach the cable clamps around each rope with a hammer. Connect the carabiner link through the thimbles. Now you can thread the rods through the pockets. Once they’re in the pockets, make sure the side dowels are on top of the front and back dowels.
If you have a tree in your garden, why not consider making garden swings? Here’s our next option, which is easier than the first one.
Materials needed for simple garden swings:
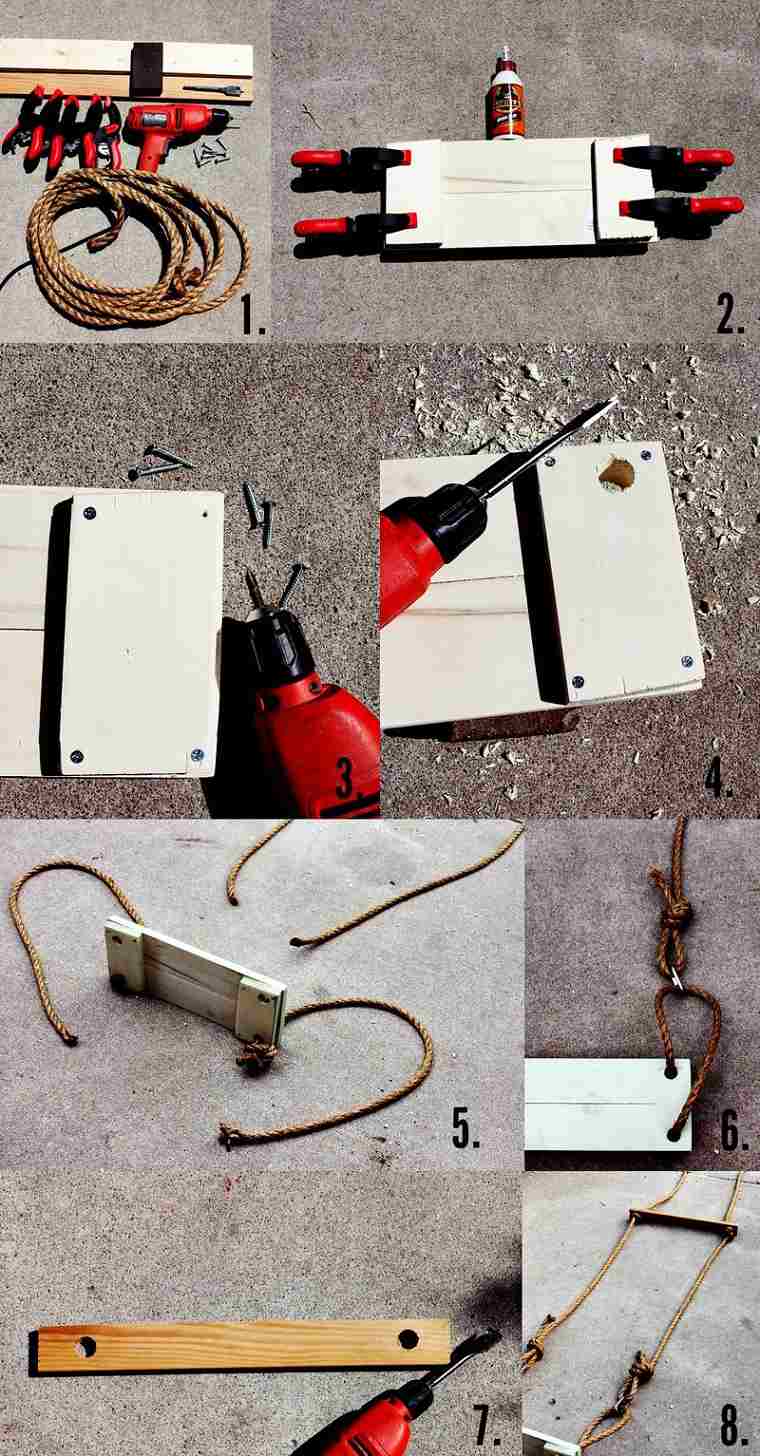
1 piece of 2x4x8 wood for the seat, 1 piece of 1x2x8 wood for the top, rope long enough to hang from the branch and strong enough to support the weight of an adult (just in case), wood glue, 2 clamps (or substitute heavy objects), drill and drill bit wide enough for your rope.

Wood screws, quick link chain, sandpaper, paint. Cut the 2x4x8 wood piece into two equal parts. Cut two more smaller pieces as shown in the photo. Place the two longer pieces side by side and glue the long sides together. Then, glue the two shorter pieces on the ends, as shown in the picture. rnrn
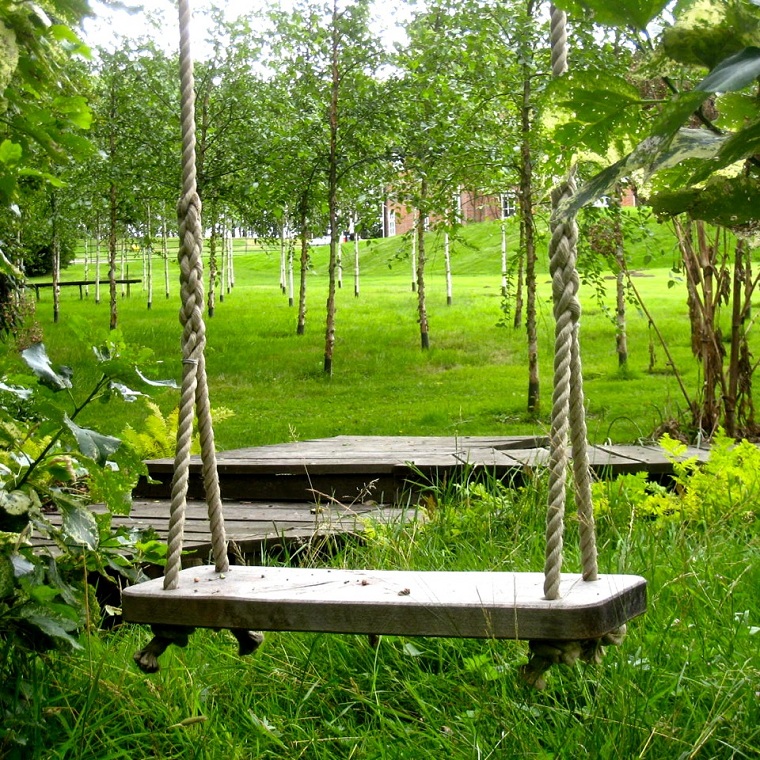
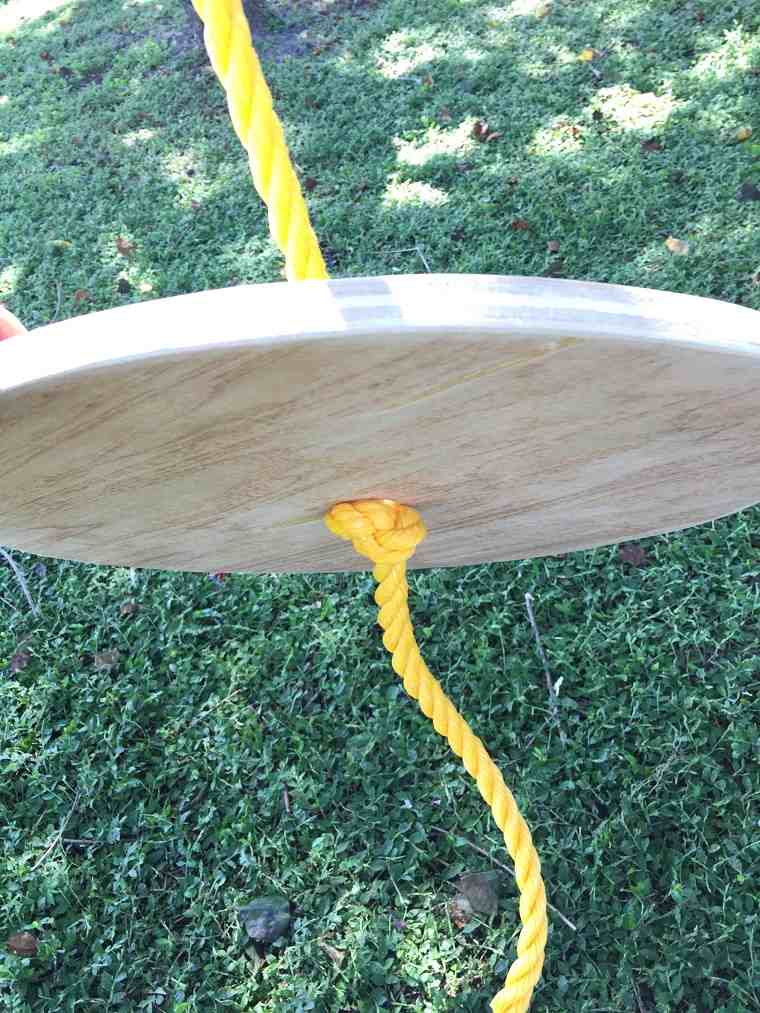
Looking to add some fun to your backyard? This weekend, you can make this DIY circle swing on a budget. Check out our tutorial and learn how to make your own swing quickly. You’ll only need about an hour or so, and you’ll be swinging away!
Materials:
You’ll need a piece of wood in the shape of a circle, a pre-made wooden circle, or a round plastic swing. You can definitely make your own circular piece to save money, but if you want an even easier DIY circle swing project, simply grab a pre-made circular seat.
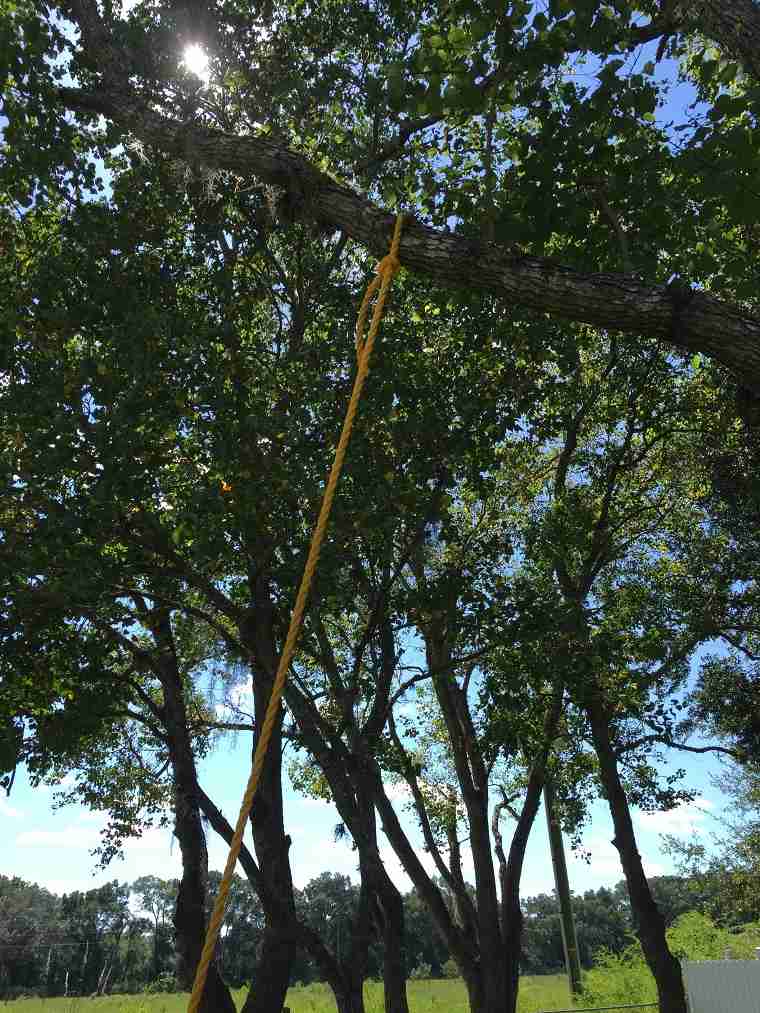
Rope (you’ll need approximately 1.5 times the distance from the ground to the branch of your tree).
Drill and drill bit to drill the hole in the center.
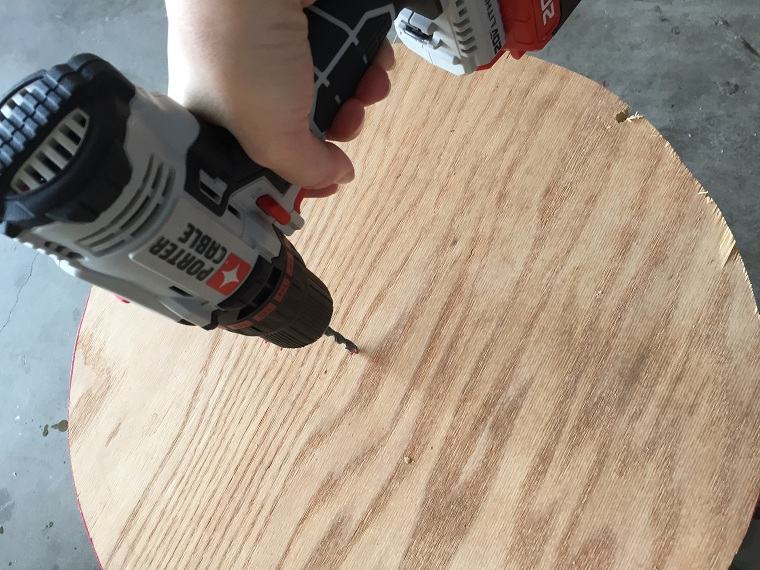
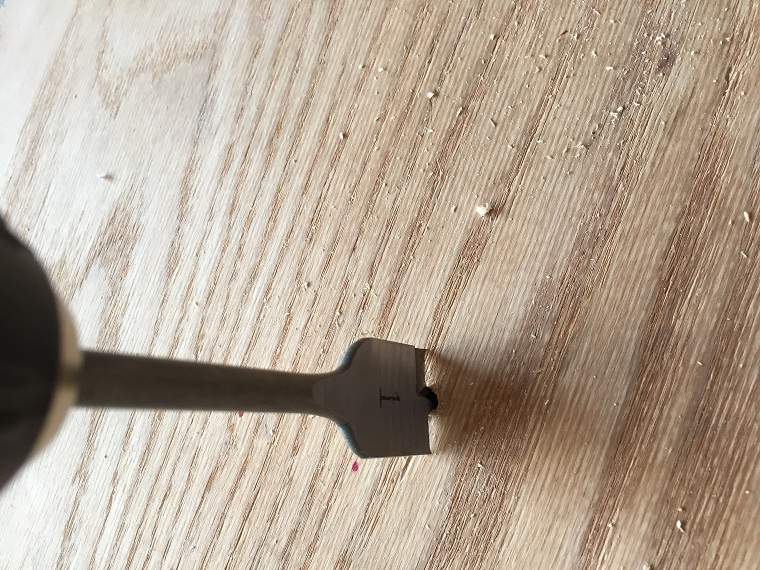
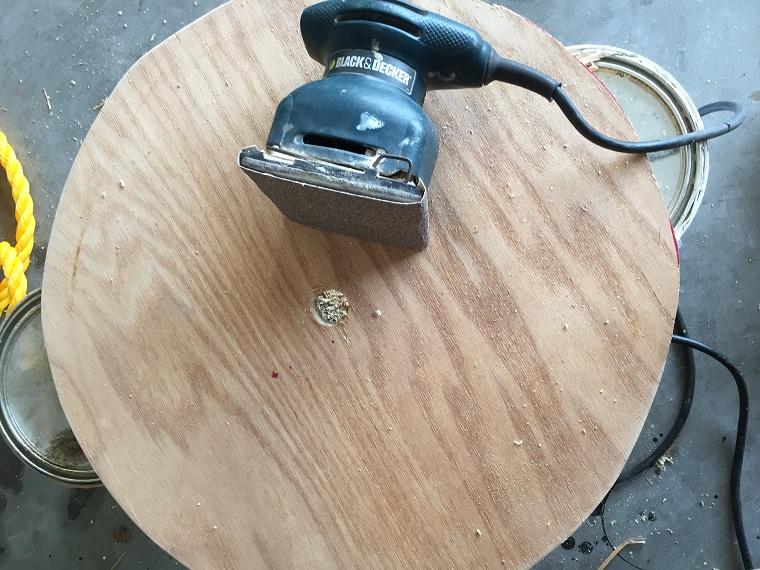
Measure and mark your center point. Place the nail at the center point and stretch the rope to the desired radius, marking the lines of the outer circle. Use a saw to cut the curved edges. Then, drill a hole in the center of your wooden piece with a slightly larger drill bit than the rope.
Take the rope and tie the top knot first before putting on the swing. Tie a knot over the tree branch. Then, pull the opposite end of the rope to adjust the knot around the limb. No ladder required!

We’re sure your backyard is missing something!
Who doesn’t love garden swings? They are every child’s favorite!
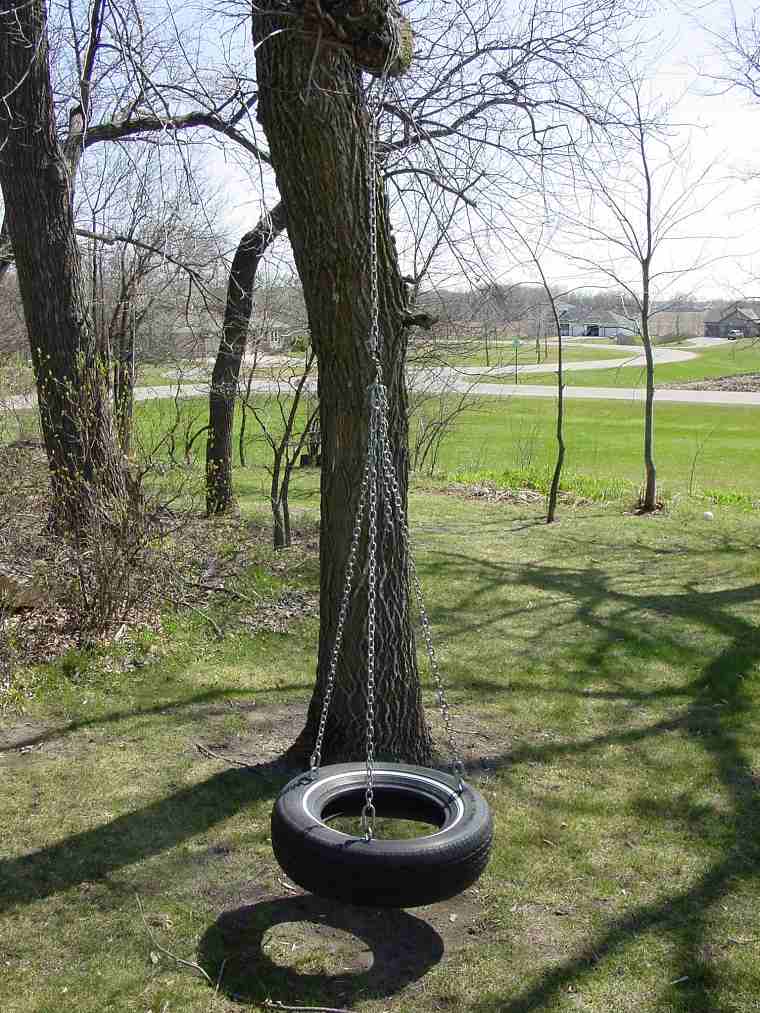
If you’re a DIY enthusiast, instead of buying a swing, you can transform an old tire and a few meters of rope into the ultimate toy. Simply drill holes in the tire a few centimeters apart and carefully thread the rope through in one piece or tie it securely.
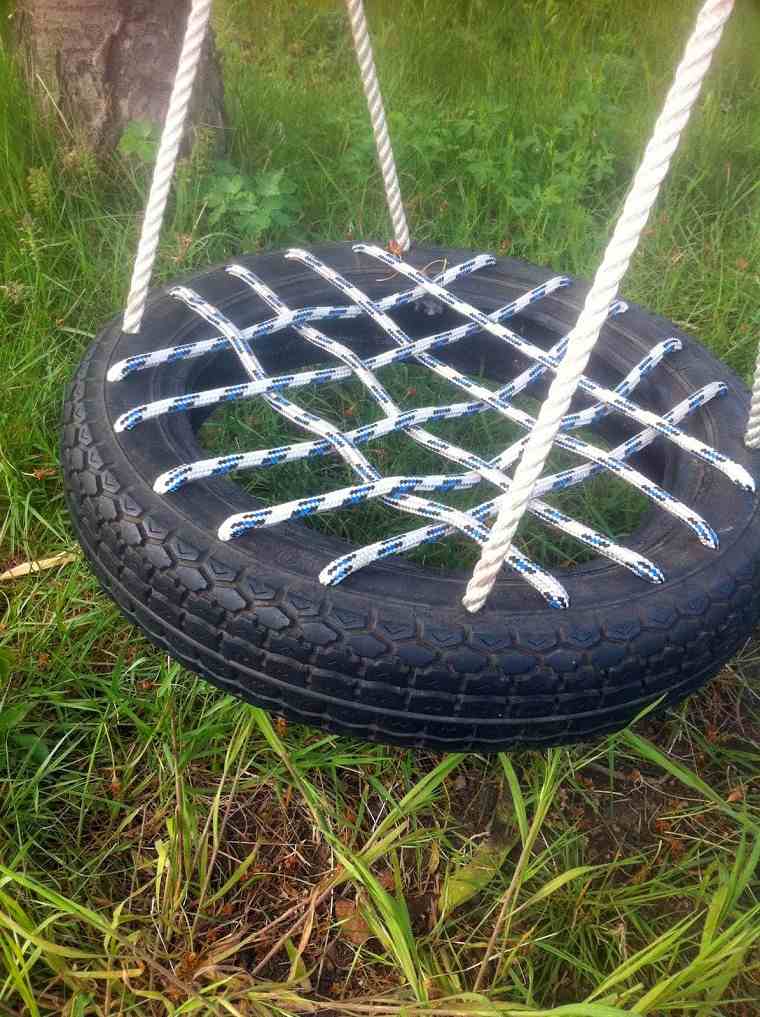
Just remember not to make the grid space too large. Otherwise, your little one will slide off quickly or get stuck.
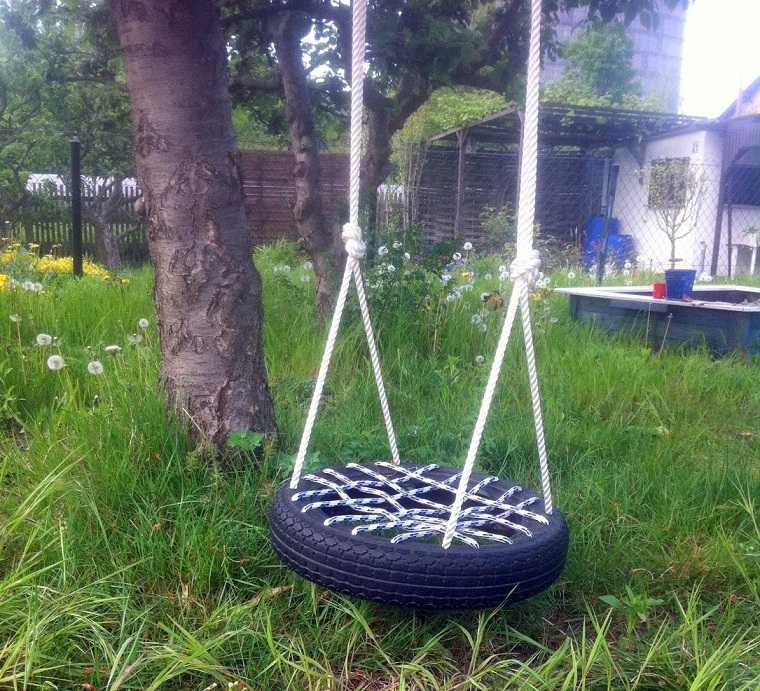
Now, let us show you another way to build a tire swing. You’ll need a simple tire converted into a swing. This option has worked for many children. But these days, simply tying a rope to a tire isn’t good enough. Tires are now mounted horizontally instead of vertically, and that presents its own challenges. Here’s how to make a professional-looking tire swing at half the price! If you’re not really interested in building a tire swing, then don’t waste your time with this tutorial. But if you’re truly interested in building a tire swing, these are serious and detailed instructions that should give you all the tools to succeed.
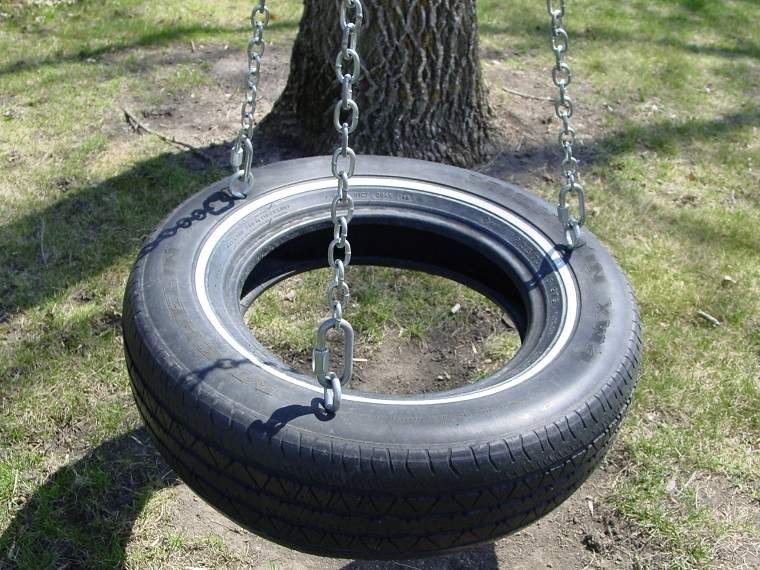
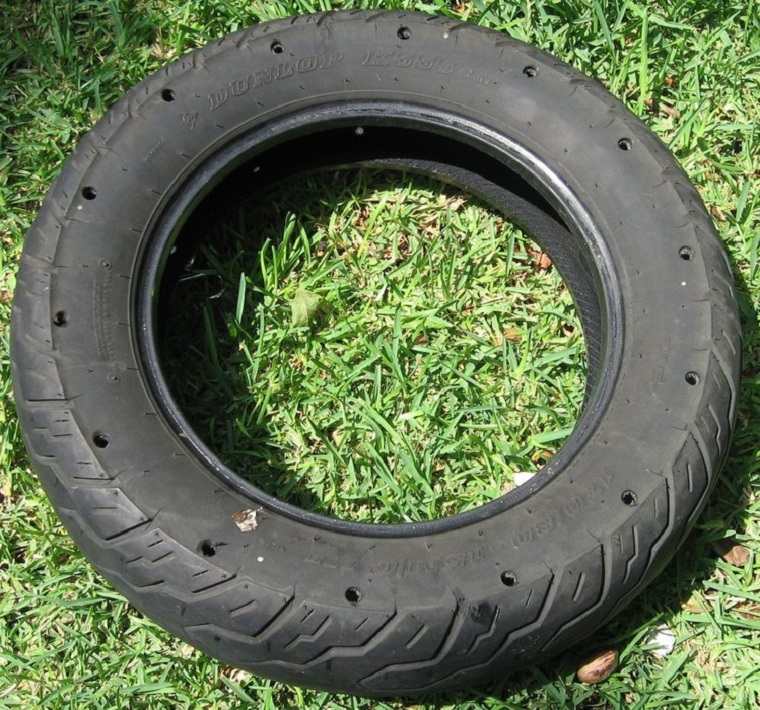
First, choose a tire. Thinking that bigger is better in this project will only get you into trouble. For smaller children, a large tire simply won’t work. For larger adults, a smaller tire should be fine, as long as the tire is bigger than the rear end! Once you’ve chosen the tire, check its condition to determine which side will be the top. Drill holes in the bottom sidewall. To do this, place the tire on a surface that will be at an appropriate height for drilling without straining your back. The holes don’t have to be perfectly spaced, but it will drain if there’s more space between the holes.
Next, flip the tire over so it’s upside down. Then, attach the eye bolts that will be connected to the chains supporting the tire swing. As a triangle is the most stable plane, you’ll want to find three points around the sidewall for each eye bolt. You can use all sorts of geometric formulas to determine the ideal points.

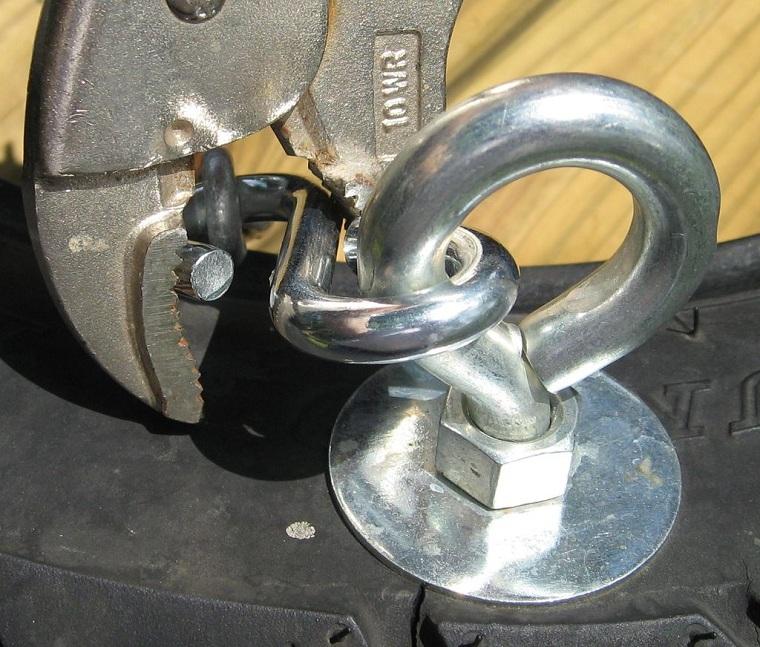
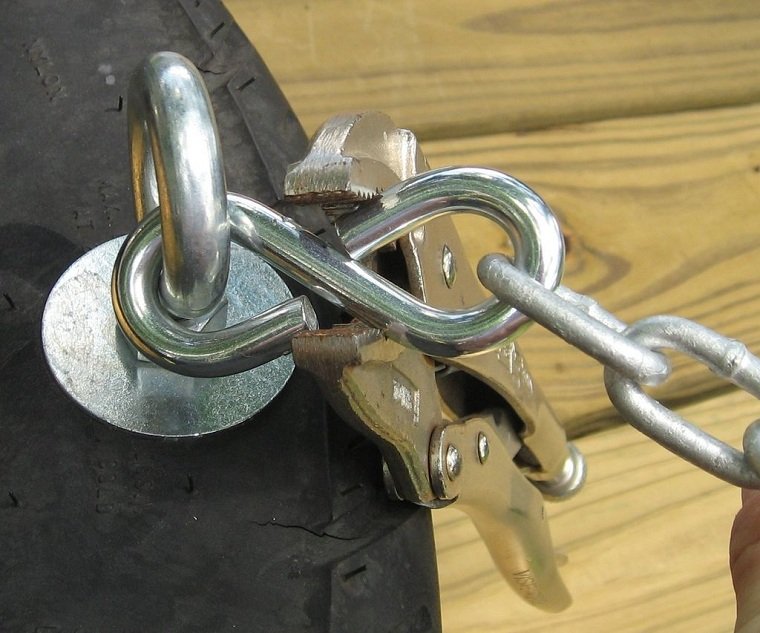
Using a pair of large pliers, squeeze the hook side so that it closes around the bolt. This requires several compressions. Adjust the shackle jaws fairly wide and tighten them, closing the S-hook a little. Open the jaws and adjust the adjusting bolt, making them a little smaller, and tighten them again, closing the S-hook a little more. Repeat this process, making them smaller each time, until the S-hook is fully closed around the eye bolt. Remember this process, as you’ll have to do it on all sides.
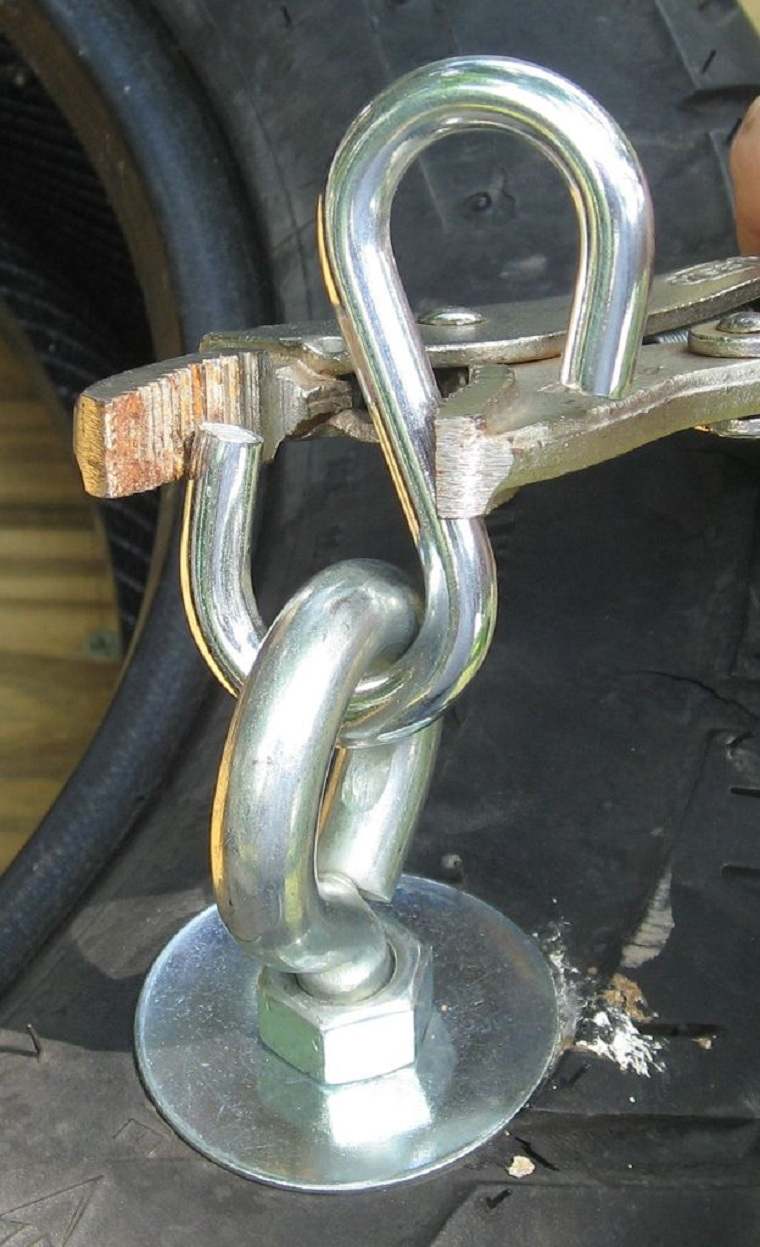
Speaking of doing it again, do it again for the second hook on the second eye bolt and for the third on the third eye bolt.

Now that the S hooks are attached to the eye bolts, it’s time to connect each of the chains to each of the attached S hooks. Here are the photos of how to do that.
Next, take another S hook and join the ends of the 3 chains on it, secure it with pliers just like the first three.
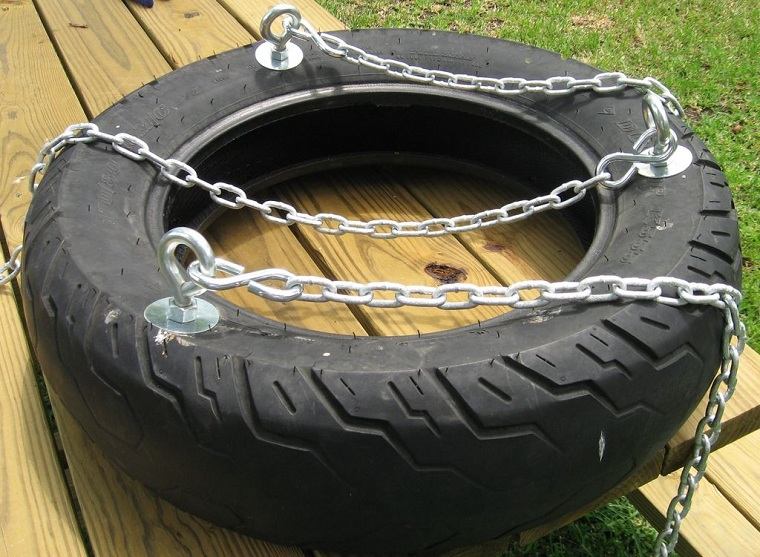
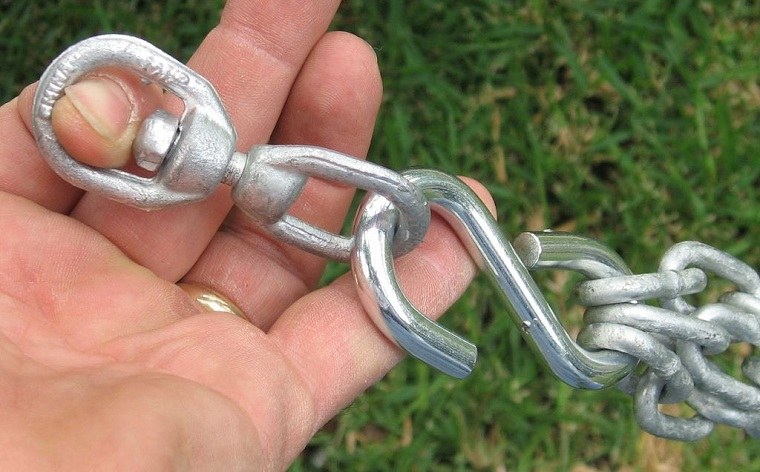
Here is the finished project, ready to swing.